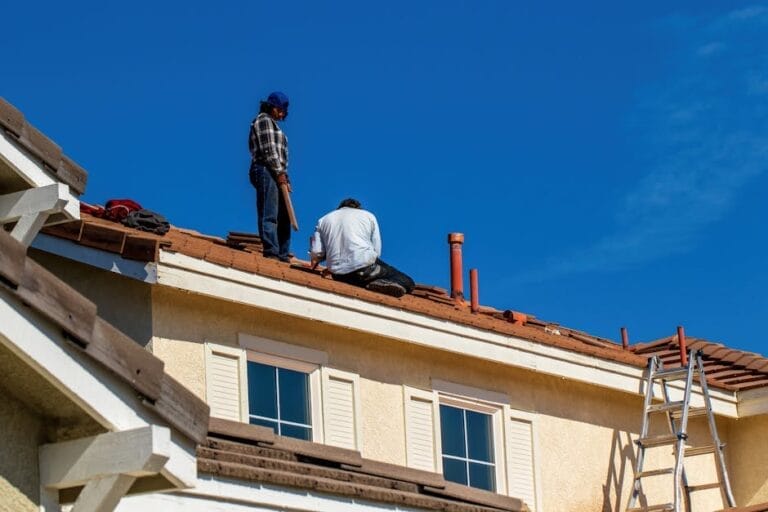
Why a Small Hole is a Big Deal for Your Metal Roof
To fix a hole in a metal roof correctly, you need a clean surface, the right sealant or patch, and careful installation that restores a fully watertight barrier. A metal roof is a long-term investment, often lasting 50 years or more, but even the toughest systems can be compromised by a single puncture. Left unaddressed, a tiny opening can channel gallons of water into your home over time, causing hidden leaks, mold, and structural damage. Proactive maintenance from experienced roofing professionals in Pasadena is one of the most reliable ways to extend the service life of any metal roofing system.
To fix a hole in a metal roof, follow these key steps for a lasting repair:
- Small Punctures (under 1 inch): Clean the area, then apply a high-solids polyether or urethane sealant directly into the hole, feathering the edges.
- Larger Holes/Tears: Clean and scuff the area. Cut a metal patch (2+ inches larger than the hole) with rounded corners. Apply sealant to the patch’s underside, press it over the hole, and secure with pan-head screws. Seal over the screws and patch edges.
- Best Conditions: Repair on a dry day with temperatures above 50°F for proper adhesion.
- When to Call a Pro: For extensive damage, safety concerns (heights), or to protect your roof’s warranty.
A metal roof is a significant investment, often lasting 50 years or more. But even this durable material can be punctured by falling debris, corrosion, or loose fasteners. Ignoring a small hole can lead to major water damage, structural issues, and mold. As your trusted Pasadena roofing experts, we know that timely and effective roof repair is crucial to protect your home’s integrity. This guide provides everything you need to know to repair your metal roof correctly and confidently.
As Jason Roberts, Owner of 12 Stones Roofing & Construction, I bring over a decade of hands-on experience to every project. My commitment to quality ensures durable results when you need to fix a hole in a metal roof and handle other roofing challenges in the Gulf Coast region.

First Steps: Assessing Damage and Gathering Supplies
Before climbing a ladder, proper preparation is key to a safe and lasting repair. Understanding the cause of the hole—whether from falling debris, hail, rust, or loose fasteners—and gathering the right tools will set you up for success.
Signs, Safety, and Essential Tools
Identifying a hole isn’t always obvious; often, the first signs appear inside your home. A tiny pinprick can cause a persistent drip, while a larger tear can lead to significant water intrusion.
What are the common causes of holes in metal roofs?
- Physical Impact: Falling branches, hail, or wind-borne debris can puncture the metal.
- Corrosion and Rust: The protective coating can be compromised over time, allowing rust to form, especially where moisture collects or if incompatible metals cause galvanic corrosion.
- Loose Fasteners: Screws that work loose create openings for water. Overtightening screws can also dimple the metal, creating water traps.
- Improper Installation: Though rare with quality roofs, installation errors can create weak spots that develop into holes.
- Temperature Fluctuations: Decades of metal expansion and contraction can stress seams and fasteners, leading to cracks.
What are the signs that a metal roof has a hole?
Water can travel before you see it. Look for:
- Water stains on ceilings or walls.
- Dripping water.
- Visible light from the attic.
- Rust spots or discoloration on the roof surface.
- Loose or missing fasteners.
- Bubbling or peeling paint on the roof, which can signify trapped moisture.
What safety precautions should be taken before repairing a metal roof?
Safety is non-negotiable. Metal roofs are slippery, even when slightly damp.
- Check the weather: Work only on a dry day with temperatures above 50°F.
- Wear appropriate gear: Use non-slip boots, heavy-duty gloves, safety goggles, and a secured safety harness. The OSHA safety guidelines are an excellent resource.
- Use a stable ladder: Ensure it’s on firm ground and extends three feet above the roofline.
- Distribute your weight: Use a large board to distribute your weight across rafters, especially on roofs not designed for concentrated loads.
- Clear the area: Remove debris from the roof surface before you begin.
What tools and materials are needed to repair a hole in a metal roof?
Having the right tools is essential for a successful repair.
- Safety gear: Non-slip boots, gloves, safety goggles, safety harness.
- Ladder: Stable and correctly sized.
- Cleaning supplies: Wire brush, rag, degreasing cleaner (like Simple Green), mineral spirits.
- Measuring and cutting tools: Tape measure, marking pencil, tin snips.
- Application tools: Caulking gun, putty knife.
- Fasteners: Power drill, pan-head sheet metal screws with neoprene washers.
- Patching materials:
- Small holes: High-solids polyether or urethane sealant.
- Larger holes: A piece of matching metal and butyl tape (optional).
- Raised seams: Asphalt-impregnated glass membrane fabric.

How to Fix a Small Hole in a Metal Roof (Under 1 Inch)
For minor punctures from a misplaced nail or small debris, a direct sealant application is a quick and effective solution.
Step 1: Clean and Prepare the Surface
The area around the hole must be impeccably clean and dry for proper sealant adhesion.
- Locate the hole: Pinpoint the exact location.
- Clean thoroughly: Use a wire brush to remove rust, loose paint, and debris in a 2-3 inch radius around the hole. Use a degreasing cleaner like Simple Green or mineral spirits for stubborn grime. Wipe the area clean and ensure it is completely dry.
- Scuff the metal: Gently scuff the immediate area with a wire brush or fine-grit sandpaper to create a rough texture, which helps the sealant bond.

Step 2: Apply a High-Grade Metal Roof Sealant
Once the surface is prepared, apply the sealant to create a watertight barrier.
- Choose the right sealant: Use a high-solids polyether or urethane-based sealant designed for metal roofs. These are flexible and durable. Avoid acidic cure silicones and asphalt-based products, which can cause corrosion or break down quickly.
- Apply with a caulking gun: Load the sealant into a caulking gun.
- Fill the hole completely: Apply a generous bead of sealant into and over the hole, covering the surrounding area by about an inch.
- Feather the edges: Use a putty knife or gloved finger to smooth the sealant, creating a seamless transition to the roof surface to prevent water from pooling.
Step 3: Curing and Inspection
Allow the sealant to cure properly for a durable repair.
- Allow for proper curing: Follow the manufacturer’s instructions for curing time, which can take up to a week depending on conditions.
- Perform a water test: Once cured, gently spray water over the repaired area to check for any leaks inside.
- Regular inspection: Periodically check the patch, especially after heavy storms. Early detection of issues can prevent a minor problem from becoming a major leaking metal roof repair.
The Definitive Guide to Fix a Hole in a Metal Roof (Over 1 Inch)
When faced with a larger hole or tear, a simple sealant application is not enough. These situations require a robust metal patch, which can last 10-15 years if installed correctly.
Step 1: Thoroughly Clean and Scuff the Area
As with smaller holes, preparation is paramount. Extend your cleaning efforts to at least a 6-inch radius around the hole.
- Clean a wider radius: Use a wire brush to rigorously remove all dirt, rust, and loose paint.
- Degrease and dry: Use a degreasing cleaner to ensure the surface is free of oils, then wipe clean and allow it to dry completely.
- Scuff the metal: Scuff the entire area where the patch will sit with a wire brush or sandpaper to improve the sealant’s bond.
Step 2: Cut and Shape Your Metal Patch
The patch must be carefully prepared for a snug fit and ample coverage.
- Choose matching metal: Use a piece of metal that matches your existing roof material (e.g., galvanized steel, aluminum) and gauge for compatibility.
- Measure and cut: Cut a metal patch that overlaps the damaged area by at least 2 inches on all sides.
- Round the corners: Use tin snips to round all four corners of the patch. This prevents the corners from snagging or lifting, which could cause future leaks.
- Smooth edges: File any sharp edges smooth.
Step 3: Apply Sealant and Set the Patch
This step creates the watertight seal.
- Trace the outline: Place the patch over the cleaned area and trace its outline onto the roof.
- Apply sealant to the roof: Apply a generous bead of high-quality polyether or urethane sealant within the traced outline.
- Press the patch firmly: Carefully place the patch onto the sealant. Press down firmly and evenly until you see sealant ooze out from all sides, indicating a tight seal.
Step 4: Secure the Patch with Screws
Screws ensure the patch remains secure against the elements.
- Choose appropriate screws: Use pan-head sheet metal screws with neoprene washers, which create a watertight seal.
- Pre-drill pilot holes (recommended): Pre-drilling small pilot holes makes installation easier and prevents warping.
- Space screws correctly: Drive screws every 2-3 inches around the perimeter of the patch, about 1 inch from the edges.
- Do not overtighten: Overtightening can dimple the metal, creating depressions where water can collect. Tighten just enough to compress the neoprene washer. For more details, our residential metal roof repair guide offers further insights.
Step 5: Final Seal and Optional Painting
These final steps reinforce the seal and improve aesthetics.
- Seal screw heads: Apply a dab of sealant over each screw head for extra protection.
- Seal the entire patch perimeter: Apply another bead of sealant around the outer edge of the patch and smooth it with a putty knife for a seamless transition.
- Allow to cure fully: Let the sealant cure according to the manufacturer’s instructions.
- Optional painting: Once cured, you can paint the patch to match your roof color for a better look and added UV protection.
What is the difference between repairing a hole in a flat panel versus a raised seam?
Repairing a hole on a flat panel is a straightforward patching job. Raised seams, however, require a different approach to allow for the metal’s expansion and contraction.
- Flat Panel Repair: Use a solid, sealed metal patch directly over the hole.
- Raised Seam Repair: For holes in a raised seam, use a flexible, asphalt-impregnated glass membrane fabric. Apply urethane sealant, lay the fabric strip over the seam, and apply another layer of sealant on top. This method maintains the flexibility needed for panel movement.
DIY vs. Calling a Professional: When to Make the Call
While a DIY repair for a small hole can be cost-effective, it’s important to know when to call a professional to prevent further damage and ensure safety. The average cost to patch a hole in a metal roof is around $375, ranging from $150 to $600, but this investment often pays for itself in peace of mind and long-term durability.
Why You Should Hire a Pro to Fix a Hole in a Metal Roof
Sometimes, the damage is too extensive, complex, or risky for a DIY approach. We strongly recommend calling a professional roofer in these situations:
- Extensive or Multiple Holes: If your roof has numerous holes, it may indicate a systemic issue that requires a more comprehensive solution than patching, such as panel replacement.
- Large Tears or Structural Damage: Big tears or buckling in the metal can compromise your roof’s structural integrity and require specialized knowledge to repair correctly.
- Uncomfortable with Heights or Ladders: Your safety is paramount. If you are not comfortable working on a roof, especially one with a steep pitch, do not attempt the repair yourself.
- Damage to Raised Seams or Flashing: Repairs involving raised seams or flashing around chimneys and vents are complex and prone to leaks if not done precisely.
- Warranty Concerns: DIY repairs can void your metal roof’s warranty. Many manufacturers require repairs to be performed by certified professionals to maintain coverage. Always check your warranty terms first.
- Older or Galvanized Metal Roofs: Older roofs can be brittle, and extensive rust may be present. A professional can assess the overall condition and recommend the best long-term solution.
- Lack of Proper Tools or Experience: We’ve seen many well-intentioned DIY attempts turn into costly mistakes that end up costing more to fix than if a professional had been called from the start.
For expert metal roof repair in Pasadena, TX, our team at 12 Stones Roofing & Construction is always ready to assist. We have the local expertise to handle the unique challenges our Texas weather throws at your roof.
| Factor | DIY Repair | Professional Repair |
|---|---|---|
| Cost | Low (materials only, $15-$50 for small holes) | Moderate to High ($150-$600 average patch) |
| Time | 2 hours (working time), 1-2 days (total time) | Variable (depends on damage, often 1-3 days) |
| Safety | High risk for inexperienced individuals | Managed by trained, insured professionals |
| Warranty | Can void existing roof warranty | Typically preserves or extends warranty |
| Quality | Dependent on skill and materials | High, with guaranteed workmanship and materials |
| Scope | Best for small, isolated punctures | Suitable for extensive, complex, or critical damage |
| Expertise | Basic roofing knowledge needed | Specialized knowledge of metal roofing systems |
Frequently Asked Questions about Metal Roof Repair
How long does a metal roof patch last?
A properly installed metal roof patch can last 10-15 years, with some high-quality sealants lasting up to 20 years. The patch’s longevity depends on the quality of materials, thorough surface preparation, proper application technique, and local environmental conditions. Regular roof inspections are highly recommended to ensure the patch remains secure and to reapply sealant if necessary.
What is the best sealant for a metal roof?
The best sealants for metal roofs are high-solids polyether or urethane-based products. These materials are engineered to adhere strongly to metal, remain flexible during expansion and contraction, and resist harsh weather. We strongly advise against using asphalt-based products, which degrade quickly, or acidic cure silicones, which can cause corrosion on metal over time.
What are the long-term risks of an unrepaired hole?
Ignoring a hole in your metal roof can lead to significant and costly long-term risks:
- Water Damage: Water can penetrate the roof deck, causing wood rot in rafters and sheathing, which compromises the structural integrity of your roof.
- Insulation Damage: Water-saturated attic insulation loses its effectiveness, leading to higher energy bills and becoming a breeding ground for mold.
- Mold Growth: Trapped moisture creates an ideal environment for mold and mildew, which can damage building materials and pose health risks, as detailed by the U.S. Environmental Protection Agency (EPA).
- Pest Infestation: Holes provide easy entry for rodents, insects, and birds, which can cause further damage to wiring and insulation.
- Reduced Lifespan of the Roof: An unrepaired hole accelerates the deterioration of the surrounding roof material, potentially requiring a full roof replacement much sooner than expected.
Protect Your Investment: Conclusion and Next Steps
Fixing a hole in your metal roof promptly is a critical maintenance task to safeguard your home. Whether you tackle a small puncture yourself or call an expert for a more complex repair, you are protecting your property from water damage and preserving the long life of your roof. A metal roof can last 50 years or more, but its longevity depends on timely intervention when problems arise.
For complex damage, if you’re uncomfortable with heights, or if you’re unsure about the repair process, seeking professional help is always the safest and most cost-effective long-term solution. The peace of mind that comes with a professional, warrantied repair is invaluable.
At 12 Stones Roofing & Construction, we provide expert assessments and durable repairs that stand up to Texas weather. If you need a reliable solution for your roof in the Pasadena, TX area, we’re here to help. Explore our expert roof repair services for a thorough inspection and a custom repair plan that keeps your metal roof performing at its best for years to come.