Why Your Concrete Roof is Leaking and What to Do About It
Concrete roof leakage repair is essential because concrete, despite its strength, is naturally porous. This permeability allows water to seep through pores, capillaries, and cracks over time. If you’re dealing with a leaking concrete roof, understanding the right repair process is crucial for a lasting solution. For property owners in the Gulf Coast region, securing your building with professional roofing services is the first step toward peace of mind.
Quick Repair Process:
- Clean the surface thoroughly and let it dry completely.
- Repair all cracks using hydraulic cement or epoxy fillers.
- Apply a waterproofing system with an elastomeric or polyurethane sealant (two coats recommended).
- Seal penetrations around vents, pipes, and corners with extra attention.
Common causes of leaks include aging concrete, thermal expansion cracks, ponding water from poor drainage, and improper initial installation. In fact, an estimated 60-70% of roof leakage problems are due to incorrect application or installation, not material failure.
Concrete roofs are particularly vulnerable in Houston’s climate. The intense heat, humidity, and frequent storms accelerate wear through scaling, cracking, and spalling. What starts as minor surface damage can quickly become a major leak that threatens your interior spaces, leading to costly roof repair bills if left unaddressed. Most concrete roof leaks can be repaired effectively when caught early and fixed properly, making a correct diagnosis and repair strategy paramount.

Identifying the Problem: Signs and Causes of a Leaking Concrete Roof
Before fixing a leak, you must identify its source and cause. This involves looking for both obvious and subtle signs of water intrusion and connecting them to common culprits.

Common Signs of a Concrete Roof Leak
A leaking concrete roof often presents several key indicators. Catching these problems early can prevent significant structural damage.
- Water Stains on Ceilings and Walls: Discolored patches or streaks on interior ceilings and walls are a primary sign. Water can travel along structural elements, so the stain may not be directly below the leak’s entry point.
- Musty Odors or Visible Mold: A persistent damp or earthy smell signals hidden moisture. Visible mold growth on walls or ceilings confirms an ongoing water issue that can pose health risks.
- Bubbling or Peeling Paint: Moisture trapped behind paint or wallpaper causes it to bubble, blister, or peel away from the surface.
- Dripping Water: The most undeniable sign of a leak, dripping water is a clear alert that a serious problem exists.
- Ponding Water on the Roof: Water that remains on a flat concrete roof for more than 48 hours after rain is considered ponding. This standing water accelerates material degradation and is a major contributor to concrete roof leakage repair needs.
- Visible Concrete Damage: A direct inspection may reveal physical damage:
- Cracks: These direct pathways for water can range from hairline fractures to wider fissures.
- Spalling: Flaking or pitting on the concrete surface, often caused by freeze-thaw cycles or rebar corrosion.
- Crazing: A network of fine, shallow cracks that can compromise waterproofing layers.
- Issues Around Penetrations: Pipes, vents, and other items penetrating the roof are potential leak points if their seals degrade over time.
What Causes Concrete Roofs to Leak?
Understanding the underlying causes is key to implementing an effective and lasting concrete roof leakage repair.
- Natural Porosity of Concrete: Concrete is not inherently waterproof. Without an effective waterproofing membrane, water can eventually seep through the slab.
- Age-Related Wear and Tear: Over time, concrete degrades, making it more susceptible to cracking, spalling, and general wear that creates opportunities for water intrusion.
- Thermal Expansion and Contraction: Temperature swings cause concrete to expand and contract, putting stress on the slab and leading to cracks. These cracks are direct pathways for water.
- Poor Initial Installation or Faulty Waterproofing: A staggering 60-70% of roof leakage problems stem from incorrect application or installation. This includes using poor quality materials, improperly applied membranes, or a lack of proper slope for drainage.
- Clogged Drains and Ponding Water: When drains on flat roofs become clogged, water accumulates. This constant saturation stresses the waterproofing layer and exploits even the smallest defects.
- Structural Shifts or Damage: Ground settlement, foundation issues, or severe weather can cause structural shifts, leading to significant cracks that compromise the roof’s integrity.
A Step-by-Step Guide to Concrete Roof Leakage Repair
A concrete roof leakage repair project requires a systematic approach. Premature failures of repair systems are often traced to improper surface preparation, so this first stage is critical.

Step 1: Thorough Surface Preparation
This is the most critical step for a successful repair, as it ensures optimal adhesion for all materials.
- Prioritize Safety: Always use appropriate safety gear, including non-slip shoes, gloves, and eye protection. Never work on a roof during rain, high winds, or extreme heat.
- Clear Debris: Sweep or blow off all loose debris, paying special attention to clearing drains and scuppers.
- Pressure Wash the Surface: Pressure washing removes embedded dirt, grime, and loose coatings. Use a medium-pressure setting to avoid damaging the concrete.
- Allow the Roof to Dry Completely: The roof must be thoroughly dry before applying any materials. Trapped moisture will cause primers and sealants to fail. This can take 24-48 hours.
- Chase Wider Cracks: For cracks wider than a hairline, use a grinder or chisel to create a V-groove. This provides a larger surface area for the repair material to create a stronger bond.
- Detailed Inspection: Once clean and dry, perform another detailed roof inspection in the Pasadena, TX area to identify any missed cracks or weak points.
Step 2: Repairing Cracks and Damage
With a prepared surface, you can now address the visible damage.
- Hairline Cracks: Use a high-quality elastomeric sealant or a penetrating concrete sealer to fill small voids.
- Larger Cracks (up to 1/8 inch): Fill these with a flexible concrete patch compound or a non-sag polyurethane sealant, smoothing it flush with the surface.
- Wider Cracks and Voids (> 1/8 inch): Use a polymer-modified repair mortar or an epoxy-based crack filler for their excellent strength and adhesion.
- Active Leaks: If a crack is actively dripping, use hydraulic cement. It sets in minutes, even in water, to plug the leak and allow for permanent waterproofing.
- Ensure a Smooth Surface: After applying any filler, use a trowel to smooth it out, creating a level surface for the waterproofing layers.
Step 3: Applying a Waterproofing System
This final step creates a continuous, impermeable barrier over the entire roof.
- Prime the Surface: Apply a compatible primer designed for concrete to improve adhesion for the top coat.
- Apply the First Coat: Use a high-quality elastomeric or polyurethane sealant, applying it evenly across the entire roof with a roller, brush, or sprayer.
- Embed Reinforcement Fabric: For extra protection over repaired cracks and joints, embed a reinforcement fabric (like polyester mesh) into the wet first coat of sealant.
- Apply the Second Coat: After the first coat has cured, apply a second generous coat of the waterproofing sealant. This creates a robust, seamless membrane.
- Seal Penetrations and Corners: These are common weak points. Apply extra layers of sealant and fabric around all roof penetrations (vents, pipes) and in all corners. This process is similar to what’s required for a leaky flat roof repair.
- Final Inspection and Curing: After the second coat, inspect for uniform coverage and allow the system to cure completely according to the manufacturer’s guidelines.
Choosing the Right Materials for Concrete Roof Leakage Repair
The effectiveness of your concrete roof leakage repair depends heavily on selecting the right materials. Understanding the difference between products is key to a lasting fix.
Roof Sealants vs. Roof Cement
These materials serve different purposes, and misusing them can lead to future problems.
- Roof Cement: Often called the “duct tape” of roofing, this is a thick, asphalt-based compound for temporary fixes like patching small holes or sealing gaps. It is not a long-term waterproofing membrane for a concrete roof, as its asphaltic base can become brittle and crack under thermal stress. While there are different types, none are a substitute for a full waterproofing system.
- Roof Sealants (Elastomeric, Polyurethane, Silicone): These are engineered to create a flexible, long-lasting, and seamless waterproof membrane, making them ideal for durable concrete roof leakage repair.
- Elastomeric Sealants: Highly elastic, they stretch and contract with the concrete’s movement, resisting UV degradation and water penetration.
- Polyurethane Sealants: Known for superior adhesion and flexibility, they are excellent for sealing joints and as a UV-stable top coat.
- Silicone Sealants: Offer excellent UV resistance and remain flexible across a wide temperature range.
For a concrete roof, high-performance sealants are the standard for long-term solutions, whereas roof cement should only be considered a temporary patch.
High-Performance Sealants: Epoxy and Polyurethane
For robust and enduring repairs, especially for cracks, epoxy and polyurethane sealants are top choices.
- Epoxy Sealants: These two-part resin systems are known for incredible strength and adhesion, creating a bond that is often stronger than the concrete itself. Epoxy is perfect for structural crack repair where you need to restore the concrete’s integrity. Because it’s rigid, it is best for filling and bonding cracks firmly rather than for coating large surfaces subject to movement.
- Polyurethane Sealants: Offering a balance of strength and flexibility, these are highly versatile. Polyurethane is excellent for sealing cracks and expansion joints and as a waterproofing top coat. Its flexibility accommodates the concrete’s natural movement from temperature changes, preventing re-cracking, and it offers excellent UV resistance.
DIY vs. Professional Repair: When to Call for Help
The decision to tackle a concrete roof leakage repair yourself or call professionals involves weighing cost against risk.
The Pros and Cons of DIY Repair
While tempting, a DIY approach to roofing has significant drawbacks.
Pros of DIY Repair:
- Cost Savings on Labor: You only pay for materials, which can be much less than professional service fees.
- Immediate Action: You can start on minor, accessible leaks without waiting for a contractor.
Cons of DIY Repair:
- Safety Risks: Working on a roof is inherently dangerous. Falls are a leading cause of construction injuries, and you risk serious harm without proper safety equipment and training.
- Improper Application: An estimated 60-70% of roof leakage problems are due to incorrect application. Without expert knowledge, you might cause more damage or create a weak spot for future leaks.
- Lack of Warranty: Professional repairs typically come with a warranty on materials and workmanship. DIY repairs offer no such guarantee.
- May Not Address the Root Cause: A DIY fix might only patch a symptom without resolving the underlying issue, leading to recurring leaks.
- Time and Effort: Proper research, surface preparation, and application take considerable time and physical effort.
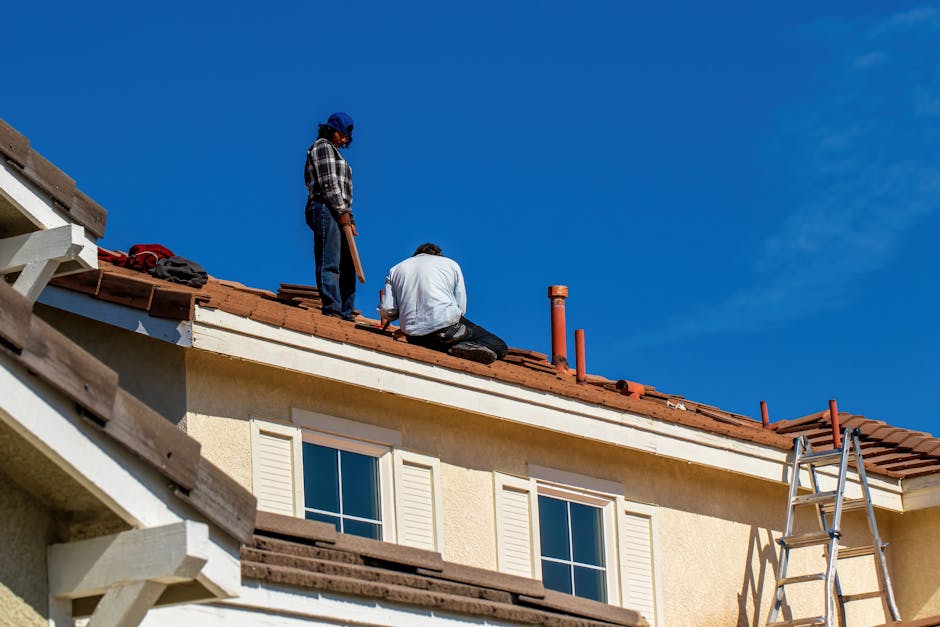
When to Contact a Professional Roofer
For many situations, calling a professional for concrete roof leakage repair is the safest and most effective choice.
- Large or Numerous Cracks (>1/8 inch wide): These often indicate deeper issues that require professional repair techniques.
- Signs of Structural Damage: Sagging, significant ponding, or cracks extending through the slab are red flags that need an expert assessment.
- Significant Ponding Water: Eliminating ponding may require re-engineering the roof’s slope, a complex task for professionals.
- Lack of Safety Equipment or Experience: If you don’t have the right gear or experience, it’s not worth the risk to your safety.
- If the Roof is Under Warranty: DIY repairs can void an existing warranty, costing you more in the long run.
- For a Guaranteed, Long-Lasting Solution: Professionals offer warranties and understand the nuances of waterproofing systems. For a trusted Pasadena, TX roofer who can guarantee their work, professional intervention is the smart choice.
Frequently Asked Questions about Concrete Roof Leakage Repair
Here are answers to common questions about concrete roof leaks.
How can I prevent my concrete roof from leaking in the future?
Preventing future leaks requires proactive maintenance. The best strategy is to be vigilant and consistent.
- Conduct Regular Inspections: Inspect your roof bi-annually (spring and fall) and after major storms. Look for new cracks, coating wear, and debris.
- Keep Drains and Gutters Clear: This is critical for flat roofs. Clogged drains cause ponding water, which is a primary cause of leaks. Regularly clear all drainage points.
- Address Small Cracks Promptly: As soon as you spot a new crack, clean the area and apply a flexible, UV-resistant concrete sealant to prevent it from worsening.
- Re-apply Top Coat Sealant: Waterproofing membranes have a lifespan. Re-apply a quality top coat sealant every 5-10 years, or as recommended by the manufacturer, to replenish the protective layer.
How do you fix ponding water on a flat concrete roof?
Ponding water must be addressed to prevent leaks. The solution depends on the severity.
- Minor Ponding: If water dries within 48 hours, you can often manage it by applying a robust, ponding-resistant waterproofing membrane, such as Ames’® Elasto-Barrier dual-rubber coating, over the area.
- Significant Ponding: If water persists, the roof likely lacks a proper slope. This requires structural modification by a professional. Solutions include:
- Adding Tapered Insulation: Installing sloped insulation boards beneath the waterproofing membrane.
- Applying a Lightweight Concrete Screed: Pouring a sloped, thin layer of lightweight concrete over the existing slab (requires engineering assessment).
- Installing New Drains: Adding more drains or scuppers to improve water flow.
Flat roofs cannot be waterproofed with tiles; they require systems like single-ply membranes or modified bitumen, all of which need a proper slope.
What is the average lifespan of a concrete roof?
The lifespan of a concrete roof involves two components: the structure and the waterproofing system.
- Concrete Structure: A well-built concrete roof slab can last 50 years or more, often matching the lifespan of the building itself.
- Waterproofing Membrane: The protective top layer has a shorter lifespan. A high-quality liquid-applied membrane typically lasts 10 to 20 years, depending on the product, climate, and maintenance. In a harsh environment like Texas, regular maintenance is key to reaching the upper end of this range.
Therefore, while the concrete structure is durable, regular recoating of the waterproofing layer is essential for a long, leak-free service life.
Secure Your Home with a Lasting Repair
Dealing with a leaking concrete roof can be stressful, but it is a problem that can be permanently resolved with the right approach. Proactive maintenance, diligent surface preparation, and the use of high-performance sealants are all critical steps in a successful concrete roof leakage repair.
While some minor fixes might seem manageable, the complexities, safety risks, and potential for long-term damage make professional intervention the wisest choice. For a comprehensive assessment and a professional repair that stands up to the unique challenges of Texas weather, trust the experts at 12 Stones Roofing & Construction.
We are committed to delivering transparent, reliable service and ensuring your concrete roof provides lasting protection for your property. Schedule your expert roof repair service with us today to secure your home and put an end to those drips for good.