Why Acting Fast on Roof Leaking Repair and Waterproofing Repair Can Save You Thousands
Roof leaking repair and waterproofing repair is one of the most urgent home maintenance tasks you’ll ever face — and the clock starts ticking the moment water gets in. When dealing with active water intrusion, partnering with a trusted Pasadena roofing contractor is the most effective way to secure your property and prevent costly structural damage.
Quick answer: What to do when your roof is leaking right now
- Place buckets under active drips to protect floors and belongings.
- Go into your attic with a flashlight and trace water trails back toward the entry point — the stain you see on the ceiling is rarely directly below the actual leak.
- Cover the damaged area on the roof exterior with a heavy-duty tarp, secured with 2×4 boards along the edges.
- Do not ignore it. Roof leaks left unaddressed for more than 48 hours can trigger secondary water damage costing 5 to 10 times more than the original repair.
- Call a licensed roofing contractor for a proper inspection and permanent fix.
A small damp spot on your ceiling might seem like a minor annoyance. But water is patient. What starts as a drip after a hard Texas rainstorm can quietly rot your roof framing, destroy your insulation, and create mold conditions in less than two days. In fact, water intrusion from roof leaks accounts for roughly 25% of all homeowners insurance claims filed annually — making it the single leading cause of home damage claims.
The good news? Most roof leaks are fixable. Many common sources — like a cracked pipe boot, loose step flashing, or a split shingle — can be repaired quickly and affordably when caught early. Homeowners who act within the first 24 hours reduce their risk of mold growth and structural damage by over 70%.
This guide walks you through everything: how to find the leak, which products actually work, when to DIY, and when to call in a pro. If you need professional roof repair services in the Pasadena area, help is closer than you think.
I’m Jason Roberts, owner of 12 Stones Roofing & Construction — a Service-Disabled Veteran-Owned firm based in Pasadena, Texas, with over a decade of hands-on experience in roof leaking repair and waterproofing repair across the Gulf Coast’s demanding climate. My team has handled everything from emergency storm tarping to full waterproofing system installations, and in this guide I’m sharing the same practical knowledge we bring to every job.

Terms related to roof leaking repair and waterproofing repair:
Common Causes of Roof Leaks and Early Detection
To stop a leak in its tracks, you first have to understand what caused it. In Southeast Texas, our roofs face intense Gulf Coast heat, high humidity, and sudden tropical downpours. These extreme weather cycles accelerate the breakdown of common roofing materials, turning small vulnerabilities into active water entry points.

The most common causes of roof leaks include:
- Aging or Cracked Shingles: Over time, UV exposure dries out asphalt shingles, causing them to curl, crack, or lose their protective granules.
- Damaged Flashing: Flashing is the thin metal installed at transitions (like valleys, chimneys, and walls). When it rusts, warps, or loses its seal, water slides right underneath.
- Clogged Gutters: When gutters fill with leaves and debris, water cannot drain. Instead, it backs up under the roof’s edge, rotting the fascia board and roof deck.
- Improper Original Installation: Roughly 30% of step flashing failures are caused by improper installation during the initial build rather than normal wear and tear.
Finding these issues before they cause indoor damage requires a keen eye. You should perform a visual inspection from the ground at least twice a year. Look for curled or missing shingles, cracked caulking around penetrations, and sagging gutters. If you catch these signs early, you can implement short-term solutions for a leaky roof before the next big storm hits.
Identifying Active Water Intrusion in the Attic
When water gets past your shingles, the attic is your first line of defense and your best diagnostic laboratory. Water rarely travels in a straight line; it typically hits the roof deck, runs down a rafter, and drips onto your ceiling feet away from the actual leak source.
To trace a leak to its origin, head into the attic on a rainy day or immediately after a storm. Bring a bright flashlight, a protective mask, and follow these steps:
- Follow the moisture uphill: Find the wet spot on your ceiling insulation and look directly up. Follow any wet wood, dark stains, or water trails up the rafters toward the peak of the roof.
- Inspect the roof deck: Look for dark water stains, black mold growth, or white efflorescence (mineral deposits left by evaporating water) on the underside of the plywood.
- Perform a water hose test: If it isn’t raining, have one person stand inside the attic with a flashlight while another runs a garden hose over specific sections of the roof. Start low on the roof slope and move upward slowly, soaking each area for 5 to 10 minutes until the indoor observer spots moisture.
Catching and treating attic moisture quickly is critical. Mold can begin growing on damp drywall and wood framing within 24 to 48 hours, turning a simple patch job into an expensive mold remediation project. For a deeper look at this process, check out our guide on how to tackle any roof leakage repair.
The Role of Pipe Boot Failures and Damaged Flashing
If you have a mystery leak, there is a very high probability it is coming from a pipe boot or a flashing joint.
Pipe boot failures are responsible for approximately 30% of residential roof leaks, making them the single most common point of failure on modern homes. The rubber gasket surrounding the plumbing vent pipe typically degrades and cracks after 8 to 15 years of intense UV exposure, while the surrounding shingles remain perfectly intact. These hairline cracks are often invisible from the ground and may only open up when the rubber is flexed by hand or subjected to strong winds.
Similarly, roof valleys and chimney flashings are constant trouble spots. Valleys channel massive amounts of water during heavy rains. If debris like pine needles or leaves is allowed to build up, it creates “debris dams” that force water sideways under the shingles.
Chimneys require custom-bent metal flashing and counter-flashing embedded in the mortar joints. If the sealant at these masonry-to-metal joints fails, water will run directly down the chimney structure and into your living space.
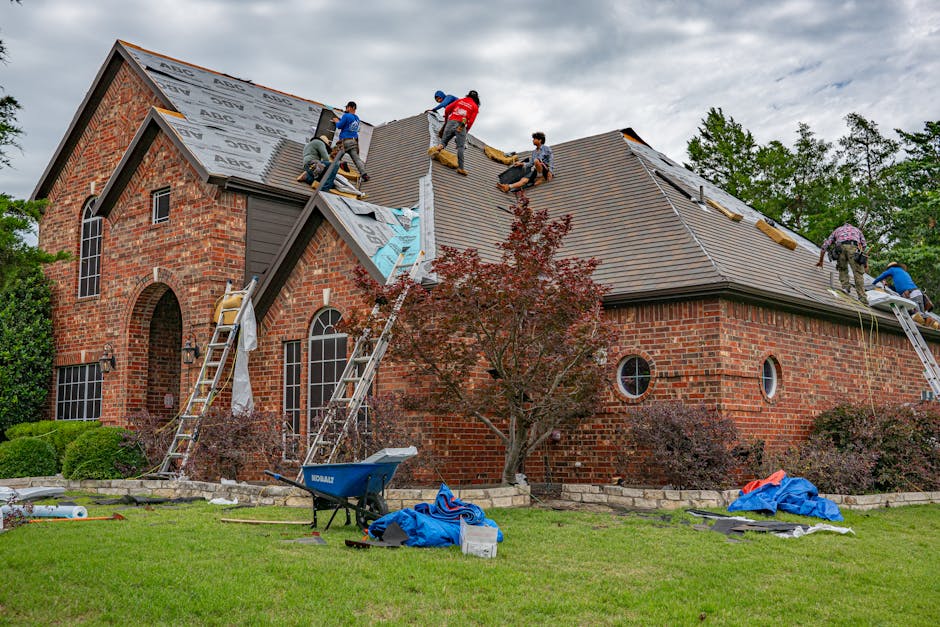
Step-by-Step Guide to Roof Leaking Repair and Waterproofing Repair
Before attempting any roof leaking repair and waterproofing repair, you must prioritize safety. Never walk on a wet roof, never work during a storm, and always wear non-slip shoes and safety glasses. If your roof is steep (a pitch of 6:12 or greater) or you feel uncomfortable at heights, leave the exterior work to a licensed professional.

Emergency Temporary Fixes to Stop the Drip
When a heavy storm is dumping water into your home, you need to act fast to prevent structural rot. A temporary repair is designed to buy you time until a permanent fix can be safely installed.
The most effective emergency method is the plastic tarp method:
- Locate the leak area: Find the approximate entry point on the roof exterior.
- Use a heavy-duty tarp: Choose a thick, woven polyethylene tarp that is large enough to cover the damaged area and extend at least 4 feet beyond it in all directions.
- Roll the top edge: Roll the top edge of the tarp around a 2×4 wooden board. Anchor this board to the roof deck on the high side of the leak using roofing nails. Never nail directly through the flat surface of the tarp, as water will seep through the nail holes.
- Secure the sides: Sandwich the remaining edges of the tarp with 2x4s and secure them with weighted sandbags or screws. Ensure the tarp is pulled drum-tight to prevent wind from catching it and tearing it away.
For smaller, localized leaks during dry spells, you can apply a temporary coat of rubberized utility sealant over exposed nail heads or small shingle tears. To learn more about quick-fix strategies, read our breakdown of temporary roof leak fixes.
Permanent Roof Leaking Repair and Waterproofing Repair Methods
Once the weather clears, you can transition from emergency mitigation to a permanent repair. Here is how to address the three most common leak sources:
1. Replacing Damaged Shingles
- Step 1: Use a flat pry bar (or “shingle ripper”) to slide gently under the damaged shingle and the row directly above it to break the adhesive sealant strip.
- Step 2: Locate the nails holding the damaged shingle in place. Slide the pry bar under the shingle, lift it slightly, and pop the nails out.
- Step 3: Pull the damaged shingle out.
- Step 4: Slide a new, matching shingle into place. Secure it with four new galvanized roofing nails driven just below the sealant line.
- Step 5: Apply a small dab of high-quality asphalt roofing cement under the tabs of the new shingle to seal it down.
2. Replacing a Blown-Out Pipe Boot
- Step 1: Carefully pry up the shingles overlapping the top and sides of the existing pipe boot flange. Do not damage the shingles, as you will need to lay them back down.
- Step 2: Remove the nails securing the old metal or plastic boot to the roof deck, then slide the boot up and off the vent pipe.
- Step 3: Clean any old sealant or debris off the roof deck and the vent pipe.
- Step 4: Slide the new pipe boot over the vent pipe. Apply a bead of polyurethane sealant to the underside of the flange before pressing it flat against the roof deck.
- Step 5: Nail the flange down along the sides and top, then weave the shingles back over the flange so that water flows smoothly over the repair.
3. Fixing Flashing and Valleys
- Step 1: Clean out all dirt, rust, and old caulking from the metal flashing joints.
- Step 2: For metal-to-metal or masonry-to-metal joints, apply a generous bead of high-performance polyurethane sealant. Never use standard silicone on masonry, as it will peel away within one season.
- Step 3: For low-slope transitions or flat roof areas, apply a liquid waterproofing membrane reinforced with a polyester fleece fabric to bridge moving seams. For flat roof systems, we recommend reading our leaky flat roof repair complete guide.
Choosing the Right Waterproofing Sealants and Patch Products
Selecting the wrong product for your roof type can result in a repair that fails during the very next rainstorm. The table below compares the most common repair sealants used in the industry today:
| Product Type | Best Substrates | Pros | Cons | Ideal Use Case |
|---|---|---|---|---|
| Rubberized Wet Patch (e.g., Henry 209 Extreme) | Asphalt shingles, modified bitumen, concrete, metal | Sticks to wet surfaces, works in freezing or hot temps | Messy to apply, dark black color | Emergency repairs during heavy rain or standing water |
| Polyurethane Sealant | Metal, masonry, flashing joints, wood | Excellent adhesion, highly flexible, paintable | Slow cure time, requires dry surfaces | Sealing chimney flashing and metal-to-metal transitions |
| Liquid Polyurethane Membrane (e.g., SikaRoof) | Concrete, roofing felt, wood, aged single-ply | Seamless, UV-resistant, cures quickly | Expensive, requires careful surface prep | Waterproofing flat roofs and complex flashing geometries |
| Kevlar-Reinforced Coatings (e.g., Rain Safe) | Metal, TPO, EPDM, concrete, asphalt | Puncture-resistant, cures underwater | High cost, specialized application | High-wear areas or flat roofs prone to ponding water |
Comparing Wet Patch, Polyurethane, and Liquid Membranes
When dealing with active water intrusion, a standard tube of silicone caulk from the local hardware store simply won’t cut it. To achieve a long-lasting waterproof barrier, professionals rely on specialized formulations.
For asphalt roofs, an ultra-premium rubberized wet patch like Henry 209 Extreme Wet Patch is the gold standard. It features a unique formulation that allows it to adhere to wet surfaces (complying with ASTM D3409) and remain flexible at temperatures ranging from -40°F to 180°F. For the most durable repair, always use the 3-course patch method: apply a layer of wet patch, embed a strip of polyester reinforcement fabric, and apply a second layer of wet patch over the top.
For flat roofs, concrete structures, or complex roof transitions, a liquid-applied polyurethane system like the SikaRoof® Liquid Membrane is highly effective. This moisture-curing membrane becomes rain-resistant in just 10 minutes and cures into a seamless, highly elastic skin that moves with your building’s natural expansion and contraction. For more information on flat roof waterproofing, read our guide on no more drips on metal roofs.
Best Practices for Roof Leaking Repair and Waterproofing Repair in Wet Conditions
Making repairs in active rain is incredibly challenging because moisture typically prevents sealants from bonding. However, emergency situations require immediate action.
If you must apply a patch while the roof is wet or submerged under ponding water, you must use a product specifically engineered for wet-surface adhesion. Products like Rain Safe Leak Repair utilize moisture-curing technology that actually uses water to activate the curing process, preventing the sealant from washing away in a downpour.
When applying these products in the rain:
- Clear the surface: Use a broom or squeegee to push away standing water, leaves, and loose granules.
- Apply firmly: Use a trowel or putty knife to press the wet-patch compound firmly into the crack or hole, forcing the water out of the joint so the sealant can make direct contact with the roof substrate.
- Reinforce: Always use a reinforcement fabric to bridge the gap, as wet-applied patches are more prone to shifting as they cure.
DIY vs. Professional Roof Repair: Costs, Safety, and Timelines
While replacing a single damaged shingle or sealing a pipe boot is a manageable weekend project for a handy homeowner, major roof repairs carry significant physical and financial risks.
When to Call a Licensed Contractor
We recommend calling a licensed contractor immediately if you encounter any of the following situations:
- Steep Roof Slopes: Any roof with a pitch greater than 6:12 requires specialized safety harnesses, ropes, and roof brackets.
- Widespread Shingle Loss: If a storm has stripped multiple sections of shingles, the underlying roof deck is likely compromised.
- Sagging Roof Deck: If you notice sagging areas on your roof line or soft, spongy spots when walking on the deck, the structural plywood has rotted and must be replaced.
- Multiple Active Leaks: When leaks are occurring in several different rooms, it usually indicates systemic failure of the roofing system rather than a single-point issue.
If you are dealing with storm damage or structural concerns in the Pasadena or La Porte areas, you can learn more about how we protect local homes by reading our guide to roof leak repair services in Pasadena, Texas.
Understanding Repair Costs, Timelines, and Insurance Claims
Understanding the financial side of roof repairs helps you make informed decisions. Here is a breakdown of what to expect in 2026:
- Minor Repairs (DIY): Replacing a pipe boot or patching a small flashing gap typically costs $15 to $50 in materials and takes 1 to 3 hours of your time.
- Minor Repairs (Professional): Hiring a pro for minor fixes ranges from $150 to $500.
- Moderate Repairs: Fixing valleys, re-flashing a chimney, or replacing a 10×10 section of damaged shingles generally costs $400 to $1,500.
- Major Structural Repairs: If water has rotted the roof trusses and decking, repairs can easily exceed $2,000 to $5,000.
- Full Roof Waterproofing/Coatings: Applying a complete liquid-applied membrane system to a flat roof typically costs between $4 and $9 per square foot. You can read more about this in our flat roof waterproofing cost guide.
Will homeowners insurance cover the repair? It depends entirely on the cause of the leak. Insurance policies typically cover sudden, accidental damage caused by “acts of God” — such as hail, fallen trees, or windstorms. They do not cover leaks caused by normal wear and tear, lack of maintenance, or aging materials.
If you suspect storm damage, document everything immediately. Take clear, dated photos of the fallen branches, missing shingles, and interior water stains. File your claim promptly and provide this documentation to your adjuster. For more details on budgeting for unexpected roofing issues, consult our emergency roof repair cost guide.
Frequently Asked Questions about Roof Leaks
Can I fix a roof leak from the inside of my attic?
No, you cannot permanently fix a roof leak from the inside. While you can apply a temporary bituminous patch or roofing cement to the underside of the wet plywood deck to divert water away from your ceiling, this is only a stopgap measure. Water will continue to seep through the shingles, trapping moisture inside the wood deck and leading to rapid rot and mold growth. The exterior source of the leak must always be identified and sealed.
How long does a typical roof waterproofing repair last?
The lifespan of a repair depends on the materials used. A temporary patch made with standard asphalt roofing cement typically lasts 1 to 3 years before drying out and cracking under the Texas sun. However, a permanent repair executed with high-quality polyurethane sealants, new metal flashing, or a liquid-applied polyurethane membrane can easily last 10 to 20 years, matching the remaining lifespan of your shingles.
What should I do if my HOA or building management ignores a roof leak?
If you live in a condominium or an apartment in Pasadena or La Porte and a leaking common-area roof is damaging your property, document the damage immediately with photos and videos. Send a formal, written notice via certified mail to your HOA board or building management company. This establishes a legal paper trail. If they remain uncooperative, consult your tenant rights or HOA bylaws, as most associations are legally obligated to maintain the building’s exterior envelope.
Conclusion
When it comes to roof leaking repair and waterproofing repair, procrastination is your home’s worst enemy. A minor drip today can quickly transform into a major structural headache tomorrow. By understanding the common causes of leaks, keeping your gutters clear, and using the right professional-grade sealants, you can protect your property and extend the life of your roof.
At 12 Stones Roofing & Construction, we pride ourselves on providing the highest quality roofing solutions to our neighbors in Pasadena and La Porte, Texas. We understand the unique challenges that our coastal climate presents, and we build every roof to stand up to the toughest weather.
If you suspect your roof has a leak, don’t wait for the next storm to test it. Visit our 12 Stones Roofing Roof Repair page to schedule a professional, honest inspection. We’ll help you seal the deal and keep your home dry for years to come.