DIY EPDM Roof: Cost, Lifespan, Installation Steps, and Whether You Can Do It Yourself
A DIY EPDM roof is a practical, long-lasting option for flat and low-slope roofs, and many homeowners can install one successfully with the right prep and materials. If you’re comparing systems and looking for trusted roofing solutions in Pasadena, EPDM stands out because it combines relatively low material cost with a service life that can exceed 50 years. For small structures like garages, sheds, porches, and additions, it is one of the most beginner-friendly flat roofing materials available.
| Factor | Details |
|---|---|
| Material | EPDM (Ethylene Propylene Diene Monomer) — a single-ply synthetic rubber membrane |
| Best for | Flat or low-slope roofs on garages, sheds, additions, and porches |
| DIY cost (200 sq ft) | $415-$695 |
| Pro installation cost | $1,200-$2,000 for the same area |
| Install time | 3-4 hours for 20m2, excluding prep |
| Lifespan | 50+ years with proper installation |
| Minimum temperature | 40F (4C) and rising |
| Recommended thickness | 60 mil for residential DIY |
Most homeowners are surprised to learn that a quality rubber roof can be installed in a single afternoon and can outlast most other flat roofing materials on the market. EPDM has been used on commercial buildings for decades because it resists UV exposure, ozone, and major temperature swings.
That said, the difference between a roof that lasts 50 years and one that fails in five comes down to installation quality. Poor surface prep, incorrect adhesive timing, or one missed corner detail can turn a straightforward weekend project into an expensive repair.
If you’re weighing professional flat roofing services against a DIY approach, this guide gives you the direct answer: what EPDM is, how to install it, what it costs, and where the real risks are hiding.
I’m Jason Roberts, owner of 12 Stones Roofing & Construction in Pasadena, Texas, with over a decade of hands-on experience installing and repairing EPDM roofing systems on residential and commercial properties across the Gulf Coast. I’ve put together this DIY EPDM roof guide so you can approach your project with the same knowledge a professional brings to the job.

Related content about diy epdm roof:
Why a diy epdm roof is the Smartest Choice in 2026
When we talk about flat roofing in places like Pasadena, TX, the environment is our biggest enemy. Between the blistering 100-degree summer days and the torrential rain from Gulf storms, traditional asphalt roll roofing often fails within a decade. By contrast, a diy epdm roof offers industrial-grade protection that can realistically last 50 years or more.

The 50-Year Lifespan
One of the most compelling EPDM roofing complete guide facts is the material’s wear rate. EPDM rubber deteriorates at a rate of approximately 1 mil per year. If you install a 60-mil membrane (the thickness we recommend for most residential projects), you are looking at five decades of performance before the material wears thin. Unlike asphalt-based products, EPDM doesn’t become brittle or crack under the intense UV radiation common in our part of Texas.
Superior Temperature Flexibility
EPDM is a “true” rubber, meaning it remains flexible in temperatures ranging from -45F to 300F. This thermal stability is critical for the EPDM story. In the Houston area, roofs can reach surface temperatures of 150F in July and then drop 40 degrees in an hour during a thunderstorm. EPDM handles this “thermal shock” by expanding and contracting without losing its watertight seal.
Real-World Cost Savings
The financial argument for doing it yourself is hard to beat. For a standard 200-square-foot roof (like a large shed or a small garage), the savings are significant.

| Installation Type | Estimated Cost (200 sq ft) |
|---|---|
| DIY EPDM Installation | $415 – $695 |
| Professional Installation | $1,200 – $2,000 |
By choosing the DIY route, you are effectively paying yourself several hundred dollars for a few hours of work.
Essential Tools and Preparation for the Roof Deck
Before you ever touch the rubber membrane, you must ensure your roof deck is ready. EPDM is a “telegraphing” material, meaning every bump, screw head, or piece of debris left on the deck will show through the rubber and eventually become a puncture point.

Choosing Your Materials
For a residential diy epdm roof, we suggest using 60-mil (0.060-inch) membrane. While 45-mil is available and cheaper, the 60-mil version is much more forgiving during installation, as it resists wrinkling and provides better puncture resistance against falling branches.
We also recommend installing 1-inch polyisocyanurate (ISO) insulation boards over your wood decking. This provides a smooth, consistent surface for the adhesive and adds an R-value of about 6.0 to your structure. When securing these boards, use manufacturer-specific fastener plates (usually one per 2 square feet) to ensure the wind doesn’t lift your new roof.
The Tools You’ll Need
Don’t start your project without these essentials:
- 9-inch rollers: For applying water-based deck adhesive.
- Penny roller: A small brass roller for tight corners.
- Silicone roller: Essential for applying pressure to seams and patches.
- Heavy-duty scissors or utility knife: For trimming the membrane.
- Moisture meter: To ensure the substrate is 100% dry (adhesives will fail on damp wood).
- Soft broom: To sweep out air bubbles.
The 300mm Overhang Rule
When ordering your EPDM rubber roofing materials, always add at least 300mm (about 12 inches) to your roof measurements on all sides. This allows for necessary overhangs, upstands against walls, and enough material to wrap over the edges and into the gutters. As the experts at Fred’s DIY Plans suggest, it is much better to trim away excess than to be an inch short on a critical corner.
Ensure Proper Drainage
EPDM is highly water-resistant, but it is not intended for “ponding” water that sits for days. Ensure your roof deck has at least a 2% slope (a 1/4-inch drop per foot). If your roof is sagging, now is the time to fix the framing or use tapered insulation to create a slope before the rubber goes down. You can learn more about different flat roof material types to see why slope is so vital.
Executing the Installation Like a Professional
The secret to a professional-looking diy epdm roof isn’t speed; it’s patience. Once your deck is clean and dry, it’s time to roll out the rubber.
The Relaxation Phase
After rolling the EPDM sheet over the roof, you must let it “relax” for at least 30 minutes. The rubber comes off the roll under tension; if you glue it down immediately, it will shrink later, causing “bridging” at the corners and pulling away from the edges. Use this 30-minute window to double-check your measurements and organize your adhesives.
Adhesive Application Strategy
For the main area of the roof, use a water-based deck adhesive. This is much easier for DIYers because it has a longer “open time” and fewer toxic fumes. For the perimeter (the outer 150mm) and any vertical upstands, you must use a solvent-based contact adhesive.
Apply the adhesive from the center of the roof outward. This prevents you from “painting yourself into a corner.” When using contact adhesive, both the roof deck and the back of the rubber must be coated. Wait until the adhesive is “tack-dry”—it should feel like a sticky Post-it note and not transfer to your finger—before bonding the two surfaces. This “tack-and-pull” test is the most reliable way to ensure a permanent bond.
Step-by-Step diy epdm roof Installation Guide
- Layout: Position the membrane so you have equal overhang on all sides. Let it relax for 30 minutes.
- Fold Back: Fold half of the membrane back over itself to expose the deck.
- Apply Deck Adhesive: Roll the water-based adhesive onto the exposed deck. Avoid “puddling.”
- Bond: Carefully roll the rubber back into the wet adhesive.
- Sweep: Use a soft-bristled broom to sweep from the center toward the edges, removing all air bubbles.
- Repeat: Repeat the process for the other half of the roof.
- Perimeter Bonding: Fold back the edges, apply contact adhesive to both the deck and rubber, wait for it to become tacky, and press into place.
For more detailed visual aids, you might find window wizardry: EPDM membrane installation made easy helpful for managing tricky vertical transitions.
Mastering Edges, Corners, and Seams
Corners are where most DIY roofs fail. Instead of cutting the rubber at an external corner, use the “pigs ear” fold. This involves pinching the excess membrane together and folding it flat against the side of the roof, creating a continuous, uncut seal.
If your roof is wider than your EPDM sheet, you will need to create a seam. Use a 6-inch wide seam tape. Clean the area with EPDM primer first—this is non-negotiable. The primer “flashes” the rubber, preparing it for a chemical bond. Overlap the top sheet by at least 3 inches, apply the tape, and use your silicone roller to apply firm pressure. Finish all edges with lap sealant to prevent water from “wicking” into the seam.
If you ever find a puncture later, our leaky flat roof repair guide covers the patching process in depth.
Critical Weather Conditions and Safety Protocols
In Pasadena and La Porte, we have to be very picky about when we install EPDM.
The Temperature Rule
Do not attempt a diy epdm roof installation if the temperature is below 40°F (4°C). Adhesives will not cure properly in the cold, and moisture from morning frost can ruin the bond. Ideally, you want a dry, clear day between 50°F and 80°F.
Safety First
Working on a flat roof feels safer than a steep one, but it can be deceptive.
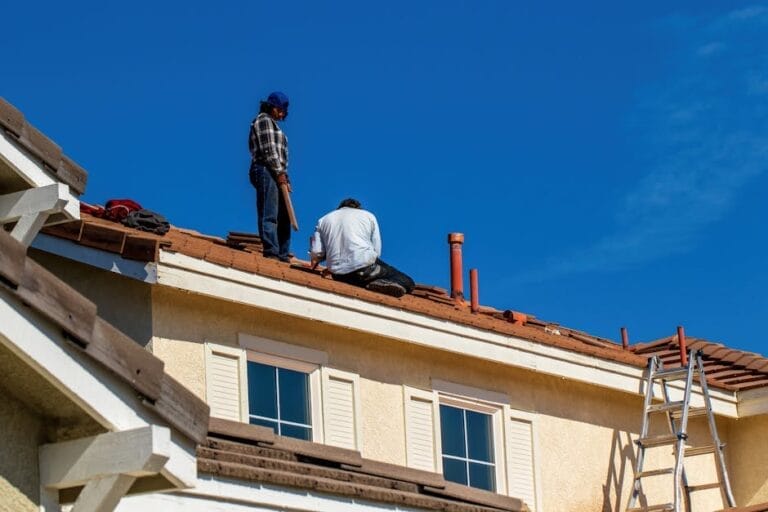
- Fall Protection: Use a safety harness if you are working near an unprotected edge.
- PPE: Wear knee pads (you’ll be on your knees a lot!) and gloves when handling solvent-based primers.
- Ventilation: Solvent-based adhesives have strong fumes. If you are working in a confined area or near a window, ensure there is plenty of airflow.
- Cleanliness: Keep a rag and some xylene or EPDM cleaner handy. If you spill adhesive on the finished side of the rubber, you have about a 4-hour window to clean it before it becomes permanent.
How to Avoid Common diy epdm roof Mistakes
Most failures we see at 12 Stones Roofing & Construction come from these three errors:
- Trapped Debris: Even a small pebble will eventually wear a hole through the rubber.
- Rushing the Relaxation: If the rubber isn’t relaxed, it will pull tight like a drum head and fail at the corners.
- Improper Priming: You cannot use seam tape or patches without EPDM primer. Soap and water are not enough; the primer is a chemical catalyst.
If these steps feel overwhelming, it’s always worth getting a professional assessment to see if a DIY project is right for your specific building.
Frequently Asked Questions about DIY EPDM
Can I install EPDM over existing shingles?
Technically, you can install EPDM over a single layer of old roofing if the surface is perfectly flat and firmly attached. However, we strongly advise against it. Stripping the roof to the deck allows you to inspect for rot and ensures the adhesive bonds directly to a solid surface. In many jurisdictions, including parts of Texas, building codes may require a full tear-off.
How long does a DIY rubber roof last?
A properly installed diy epdm roof can last 50+ years. Because the material is highly resistant to UV and ozone, it doesn’t “age out” like asphalt. Most “failures” are actually seam or flashing failures, which is why we emphasize using the correct primers and rollers during installation.
Is it safe to walk on an EPDM roof?
Yes, EPDM is durable enough for occasional foot traffic (for example, to clean gutters or service an AC unit). However, you should never wear heavy boots with sharp treads or gravel stuck in the soles. If you plan to use the roof as a deck, you must install walkway pads or a floating deck system on top of the membrane to protect it from abrasion.
Conclusion
Installing a diy epdm roof is an empowering project that can save you thousands of dollars while providing your home with half a century of protection. By following the steps of cleaning, relaxing, and careful adhesive application, you can achieve a result that rivals any professional crew.
However, we know that life gets busy, and roofing is physically demanding work. If you find yourself halfway through the planning phase and realize you’d rather have the peace of mind that comes with a professional warranty, 12 Stones Roofing & Construction is here to help. We are local experts in Pasadena and La Porte, TX, and we understand exactly what it takes to make a rubber roof survive the Texas heat.
Whether you need a full installation or just a professional eye to check your DIY work, visit our EPDM roofing page for more information. Let’s make sure your roof is ready for whatever the Gulf Coast throws at it!