Why Acting Fast on Roof Leaks Protects Your Home
A leaking roof can quickly escalate from a minor inconvenience into a catastrophic problem. That’s why finding a trusted professional for roof repair for leaks is one of the most critical maintenance tasks for any homeowner. A small water stain can signal underlying issues that may compromise your home’s structure, foster dangerous mold growth, and lead to repair bills ranging from $2,000 to $5,000 or more if left unaddressed.
Quick Steps to Address a Roof Leak:
- Contain Damage: Place buckets under drips and move furniture.
- Find the Source: Inspect your attic for water stains or light penetration. The entry point is often not directly above the drip.
- Apply a Temporary Fix: Use a tarp or roofing tape/sealant for small cracks.
- Assess the Damage: Determine if it’s a DIY job or requires professional help.
- Make the Repair: Replace shingles, reseal flashing, or patch vent boots.
- Prevent Future Leaks: Schedule regular inspections and clean your gutters.
The average professional repair costs $360 to $1,550, while DIY materials are $10 to $120. Since mold can grow within 24 to 48 hours of water intrusion, immediate action is essential.
I’m Jason Roberts, owner of 12 Stones Roofing & Construction. With over a decade of experience on the Gulf Coast, I’ve handled everything from emergency storm tarping to complete roof replacements. This guide will walk you through identifying, temporarily stopping, and properly repairing common roof leaks, and help you know when to call a professional.
 Contain interior damage with buckets and towels, 2) Locate the leak source by inspecting the attic for water stains and following water trails upward, 3) Apply temporary fixes like tarps or roofing tape, 4) Assess whether the repair is within DIY capabilities or requires professional help, 5) Execute the repair by replacing shingles, resealing flashing, or patching damaged areas - Roof repair for leaks infographic")
Roof repair for leaks terms at a glance:
First Steps: How to Find and Temporarily Stop a Roof Leak
Water stains, musty smells, and peeling paint are classic signs of a roof leak. When you spot them, every minute counts. First, protect your home’s interior by placing buckets under drips and moving furniture and electronics away from the area.
Next, begin your detective work. The leak’s entry point on the roof is almost never directly above the ceiling stain. Water can travel along rafters and insulation before dripping through your ceiling. The breach could be near a chimney, vent pipe, or skylight far from the visible interior damage.

Attic Inspection: Your First Clue
Your attic holds the key. With a flashlight, gloves, and safety goggles, look for water stains (dark spots or streaks) on the underside of the roof decking. Trace these stains uphill toward the roof’s peak to find the entry point. Also, look for mold or damp, compressed insulation. On a sunny day, turn off the lights; any pinpricks of daylight are direct entry points for water. Widespread dampness without a clear trail could indicate a condensation issue from poor attic ventilation. For more tips, see this homeowner’s guide to detecting a roof leak.
Water Testing with a Hose
If the attic inspection is inconclusive, perform a controlled water test with a helper. One person watches from the attic while the other soaks small sections of the roof with a garden hose, starting from the bottom and working up. Focus on vents, chimneys, and skylights. When your helper inside spots a drip, you’ve pinpointed the leak’s location.
Temporary Fixes: Buying Time
Once you’ve found the leak, act fast to minimize damage. Use buckets and towels to contain water. If a bulge forms in your ceiling, water has pooled in the drywall. Carefully puncture the center with a screwdriver to drain it in a controlled manner. This prevents a larger collapse and simplifies future repairs.
For the roof itself, exterior tarping is a crucial temporary measure during storms. The tarp should extend at least four feet beyond the damaged area and be secured firmly. Warning: Do not attempt this on a wet or steep roof or in bad weather. For emergencies, our team provides emergency roof tarping services to protect your home safely.
For small cracks, roofing tape or exterior caulk can provide a temporary seal on a clean, dry surface. These are emergency measures, not permanent solutions. Mold can grow in wet areas within 24-48 hours, so move quickly toward a permanent repair.
Common Leak Hotspots and How to Fix Them
Most roof leaks occur at vulnerable points where the roof is penetrated or materials have aged. Understanding these hotspots—plumbing vents, chimneys, skylights, roof valleys, and damaged shingles—is key to finding and fixing leaks.

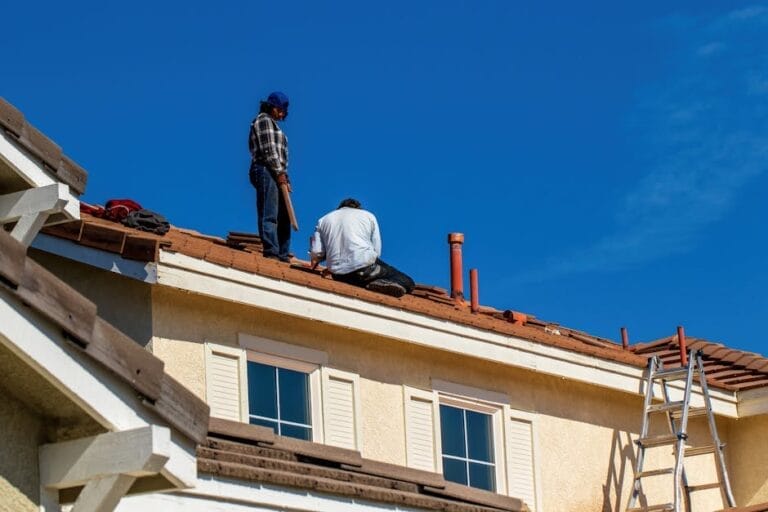
Safety and Tools for Roof Repair
Safety is non-negotiable. Always work on a dry, stable roof with proper fall protection. Use a sturdy ladder that extends three feet above the roof edge and wear soft-soled, high-grip shoes. If you feel unsafe, especially on a steep pitch, stop and call a professional.
For most roof repair for leaks, you’ll need a caulking gun, roofing cement, a pry bar, matching replacement shingles, roofing nails, a utility knife, and a wire brush. Using quality materials ensures a longer-lasting repair. For more guidance, consult this step-by-step guide to fixing a leaky roof.
How to Perform Roof Repair for Leaks Around Vents and Pipes
The rubber boot (or “collar”) around plumbing vents often cracks from sun exposure, letting water in. The metal flashing at the base can also fail.

- Cracked Vent Boots: For a temporary fix, apply a flexible roof sealant over the crack. For a permanent solution, replace the entire boot. This involves lifting the surrounding shingles, removing the old boot, sliding a new one into place, and securing it with roofing nails under the shingles. Seal all nail heads and shingle edges with roofing cement.
- Damaged Flashing: If the metal base is cracked or rusted, the entire vent boot assembly must be replaced. Carefully remove the surrounding shingles and nails, install the new assembly, and ensure it is properly sealed to channel water over the penetration. Learn more about how water infiltration can cause roof damage from rain.
How to Fix Leaks Around Chimneys and Skylights
The metal flashing system where a chimney or skylight meets the roof is a common failure point. Sealant degrades and metal can rust or pull away.

- Deteriorated Flashing: If flashing is loose but intact, you may be able to re-secure it with roofing cement and nails. If it’s rusted, has holes, or is severely damaged, it must be replaced.
- Cracked Sealant: Scrape away all old, failed sealant around the flashing. Clean the surface with a wire brush and apply a fresh bead of exterior-grade silicone or urethane caulk.
- Chimney Crown: Inspect the concrete cap at the top of the chimney for cracks, which can let water into the chimney structure itself. Seal any cracks with masonry sealant.
How to Handle Roof Repair for Leaks from Damaged Shingles
A single cracked, curled, or missing shingle is enough to cause a leak. Asphalt shingles typically last 20-25 years before they begin to fail.

- Curled Shingles: On a warm day, gently lift the curled edge, apply a bead of roofing cement underneath, and press it down firmly.
- Cracked Shingles: Apply roofing cement under the crack, press the shingle down, and then apply a thin layer of cement over the crack itself.
- Missing Shingles: Gently lift the shingles above the gap, pry out any old nails, and slide a new shingle into place. Secure it with roofing nails placed where the overlapping shingle will cover them, and seal the nail heads with roofing cement.
Significant granule loss is a sign that your shingles are aging and becoming vulnerable. After a major storm, consider a professional inspection, as hail can cause widespread, hard-to-see damage. For more information, see our guide on hail damage roof repair.
The Risks of DIY vs. When to Call a Professional
While a DIY approach to minor roof repair for leaks can save money on materials (typically $10 to $120), it carries significant risks. A botched repair can worsen the damage, and working on a roof is inherently dangerous. Knowing your limits is crucial.
Key Risks of DIY Roof Repair
- Safety Hazards: Falls from ladders or slippery roofs are a primary concern and can cause serious injury. Always prioritize safety.
- Electrical and Fire Risk: Water leaking onto electrical wiring in an attic can cause a short circuit, creating a serious fire hazard. If you suspect this, turn off power at the breaker and call an electrician and a roofer immediately.
- Structural Damage: Prolonged water exposure can rot roof decking, rafters, and wall studs, compromising your home’s structural integrity.
- Mold Growth: Mold can grow within 24-48 hours, posing health risks like allergies and respiratory issues.
The Professional Advantage
Hiring a licensed and insured professional offers benefits beyond safety. Professionals provide an accurate diagnosis of the root cause, not just the symptom. They have the experience to spot hidden issues like inadequate ventilation or widespread rot. Furthermore, professional work is typically backed by a warranty, giving you peace of mind that you don’t get with a DIY fix. While a professional repair costs more upfront ($360 to $1,550 on average), it prevents costlier damage down the line and ensures the job is done right. For a reliable diagnosis and solution, consider a professional roof repair service.
When to Call a Professional
It’s time to call a professional roofer if you encounter any of the following:
- Widespread damage, such as multiple missing shingles or large holes.
- A persistent leak that your DIY fix didn’t solve.
- Difficult-to-reach areas, including steep roofs or complex rooflines.
- Safety concerns where you feel uncomfortable or unsafe on the roof.
- Signs of hidden damage, like mold, musty smells, or sagging roof areas.
Expert roofers in Pasadena can provide thorough inspections to catch problems before they become catastrophes, ensuring your home and family are protected.
Prevention: Your Best Defense Against Future Leaks
The most effective way to handle roof repair for leaks is to prevent them from happening in the first place. Proactive maintenance extends your roof’s life and saves you from costly emergency repairs. It’s also vital to know when a simple repair is no longer enough and a full replacement is the smarter choice.

Essential Roof Maintenance Tips
- Regular Inspections: Examine your roof twice a year (spring and fall) and after major storms. Use binoculars from the ground to look for missing, cracked, or curled shingles and damaged flashing.
- Gutter Cleaning: Clogged gutters cause water to back up under shingles and into your home. Clean them at least twice a year to ensure water flows away from your foundation.
- Trim Tree Branches: Keep branches at least three feet from your roof to prevent them from scraping shingles or falling and causing damage during a storm.
- Ensure Proper Attic Ventilation: Good airflow prevents heat buildup in summer, which can cook shingles, and moisture condensation in winter, which leads to mold and rot. Make sure soffit and ridge vents are clear.
Repair vs. Replacement: Making the Right Call
Sometimes, patching an old roof is no longer cost-effective. Consider these factors to decide between repair and replacement:
- Roof Age: If your asphalt shingle roof is nearing or past its 20-25 year lifespan and has recurring leaks, replacement is likely the best option.
- Extent of Damage: A few damaged shingles can be repaired. However, widespread issues like granule loss, multiple leaks, or soft spots in the decking indicate systemic failure. If more than 10% of your roof is damaged, replacement is often more economical.
- Cost-Benefit Analysis: Spending hundreds or thousands on repeated repairs for a failing roof is often a poor investment. A full replacement, while more expensive upfront ($8,000 to $12,000 on average), provides 20+ years of protection, improves energy efficiency, and increases home value.
To stay on top of preventive care, download our roof maintenance checklist. If you’re unsure whether you need a repair or replacement, schedule a professional roof inspection for an honest assessment of your roof’s condition.
Frequently Asked Questions about Roof Leak Repair
How much does it cost to fix a roof leak?
The cost to fix a roof leak varies significantly. A minor DIY repair may only cost $10 to $120 for materials. However, professional roof repair for leaks is the recommended route for most homeowners and typically costs between $360 and $1,550. The final price depends on the leak’s location, severity, and roof accessibility. Ignoring a leak is far more expensive, as extensive water damage restoration can easily cost $2,000 to $5,000 or more.
Can a roof leak cause a fire?
Yes, a roof leak can cause a fire. This is a hidden but serious danger. When water from a leak comes into contact with electrical wiring, junction boxes, or light fixtures in your attic or walls, it can cause a short circuit. This can lead to electrical arcing and overheating, which may ignite insulation or wood framing. If you see water near electrical components or notice flickering lights, turn off the power at the main breaker immediately and call both an electrician and a roofer.
How long does it take for mold to grow from a roof leak?
Mold can begin to grow in as little as 24 to 48 hours after water intrusion. It thrives in damp, warm conditions with an organic food source like wood or drywall. This rapid growth is why immediate action is critical. Once established, mold can spread and pose serious health risks, including triggering allergies and asthma attacks. To prevent mold, you must contain the water and thoroughly dry the affected area as quickly as possible.
Your Next Steps After a Roof Leak
Fixing the leak is only the first step. Once the roof is secure, you must address the interior water damage to prevent mold and structural decay. Water that has soaked into insulation, drywall, and wood will not disappear on its own and creates a perfect breeding ground for mold, which can grow in just 24 to 48 hours.
Here’s a quick action plan:
- Remove Standing Water: Use a wet/dry vacuum to extract water from floors and carpets. Remove and discard any soaked insulation.
- Dry the Area: Use fans and dehumidifiers for at least 48-72 hours to pull all moisture from the space, including hidden moisture in walls and ceilings.
- Clean and Disinfect: Clean all affected surfaces with a mold-inhibiting cleaner to prevent spore growth. For large areas of mold (over 10 sq. ft.), professional remediation is recommended.
- Repair Interior Damage: Once completely dry, replace any drywall, plaster, or insulation that is sagging, crumbling, or stained. Even if drywall appears intact, water damage can compromise its integrity.
If you’re facing a persistent leak or extensive damage, don’t hesitate to seek expert help. The team at 12 Stones Roofing & Construction provides reliable roof repair solutions for homeowners across the Pasadena, TX area. We understand the stress water damage causes and are here to help you restore your home and peace of mind. Learn more about our comprehensive water damage repair services to get your home back to normal as quickly as possible.