
A Leaking Roof Can Destroy Your Home Faster Than You Think
Home roof leak repair is one of the most urgent and time-sensitive projects a homeowner will ever face. Water is patient. A small drip after a rainstorm can quietly rot your rafters, grow mold inside your walls, and warp your ceilings — often before you ever notice the damage spreading. When water breaches your home’s defenses, partnering with a trusted local contractor like 12 Stones Roofing & Construction is the most effective way to secure your property and prevent long-term structural decay.
The good news? Most roof leaks can be found and fixed — if you act fast.
Here’s a quick overview of how to handle a roof leak:
- Stop interior damage first — move valuables, place buckets, and poke a small hole in any sagging ceiling bubble to drain trapped water safely
- Find the source — inspect your attic with a flashlight and trace wet trails uphill along rafters to the actual entry point (water travels far from where it drips)
- Apply a temporary fix — cover the damaged area with a heavy-duty tarp or apply roofing cement to small cracks and flashing gaps
- Make a permanent repair — replace damaged pipe boots, step flashing, or shingles once the roof is dry and safe to walk on
- Call a pro — if you see structural rot, multiple leaks, or a steep pitch, skip the DIY and contact a licensed roof repair contractor immediately
60% of hidden water damage starts above the ceiling and spreads through wood, drywall, and insulation before any visible sign appears inside the home. For Pasadena, Texas homeowners — where Gulf Coast storms, intense heat, and high winds accelerate roof wear — catching a leak early is not just smart, it’s essential.
For a deeper dive on tracing and fixing leaks systematically, How to Find and Fix Roof Leaks is a solid technical reference. You can also read our own guide: From Drip to Dry: How to Tackle Any Roof Leakage Repair.
I’m Jason Roberts, owner of 12 Stones Roofing & Construction, a Service-Disabled Veteran-Owned roofing firm based in Pasadena, Texas, with over a decade of hands-on experience in home roof leak repair across the Gulf Coast region. In this guide, I’ll walk you through every step — from finding the source of your leak to knowing when a DIY fix is enough and when it’s time to call in a professional.
Quick Home roof leak repair definitions:
Common Causes and Early Signs of Roof Damage
To stop a leak, we must first understand why it started. Roofs in Pasadena and La Porte, Texas, are subjected to extreme atmospheric conditions. Intense UV exposure, thermal expansion, and sudden tropical downpours create a demanding environment for residential roofing systems.
Primary Vulnerabilities
The vast majority of residential roof leaks do not stem from a widespread failure of the shingles themselves. Instead, they originate at specific penetration points, transitions, and drainage areas.
- Degraded Pipe Boots: Plumbing vent pipes project through your roof slope to vent sewer gases. The rubber collar (or boot) surrounding these pipes degrades under intense Texas sunlight. Typically, rubber boot gaskets crack and fail within 8 to 15 years, far sooner than the surrounding asphalt shingles.
- Damaged Step Flashing: Wherever a roof surface meets a vertical wall, dormer, or chimney, metal step flashing is woven between shingle layers to channel water down the roof. If this flashing rusts, pulls loose, or was improperly installed, water will slip directly behind your siding and into your home’s framing.
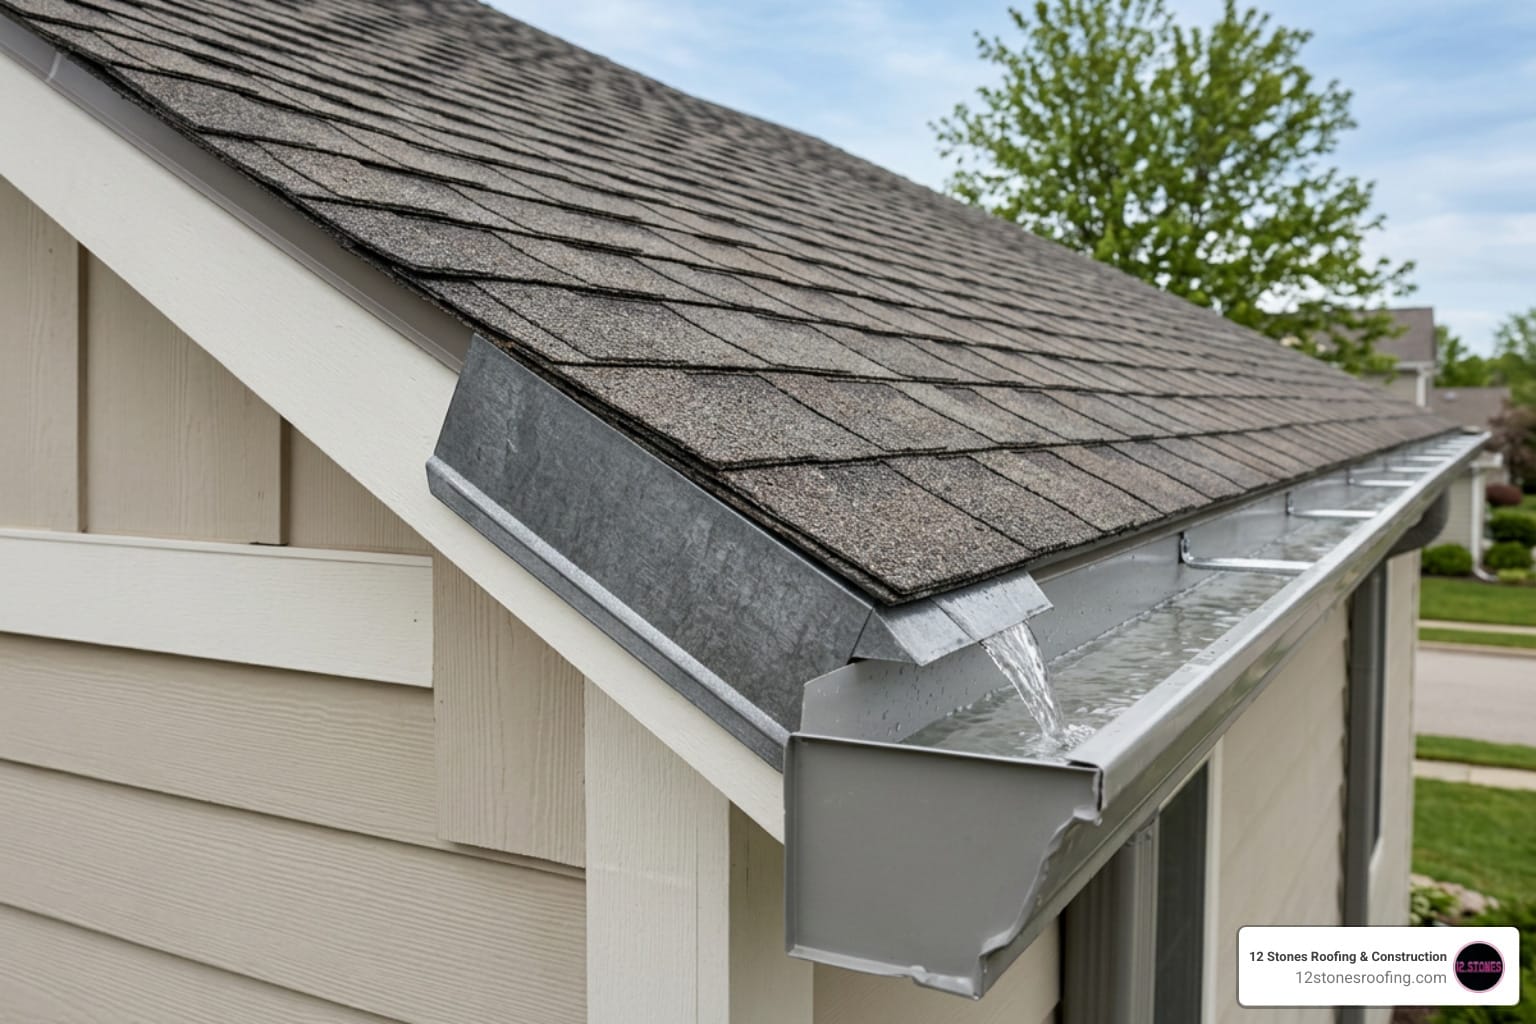
- Clogged Gutters: When gutters fill with leaves, twigs, and shingle granules, rainwater cannot drain. The water pools at the roof’s edge, backing up under the lower shingle courses and rotting the fascia boards and roof deck.
- Cracked or Missing Shingles: High Gulf Coast winds can lift, tear, or completely blow away individual shingles, leaving the underlying asphalt-saturated felt or synthetic underlayment directly exposed to the elements.
- Condensation and Attic Moisture: In humid climates like Pasadena and La Porte, inadequate attic ventilation traps hot, moist air. This moisture condenses on the underside of the roof deck, mimicking a roof leak by dripping onto your ceiling and fostering mold growth.
If you are wondering whether your specific issue is a simple fix or requires an expert eye, read our detailed analysis on Can You Fix a Roof Leak Yourself? Here’s How to Find and Repair It.
Identifying Interior and Exterior Warning Signs
Early detection is your absolute best defense against catastrophic water damage. We recommend performing a visual inspection of your roof structure at least twice a year — once in the spring and once in the fall — as well as immediately following any major storm.
Interior Indicators
- Water Stains: Dark, expanding brown or yellow rings on your ceilings or upper walls.
- Peeling or Bubbling Paint: Moisture trapped behind drywall paint causes it to stretch, bubble, or peel away from the wall.
- Musty Odors: A persistent damp, earthy smell in your attic or upper rooms indicates active mold or mildew growth.
- Active Dripping: Hearing water dripping or seeing active moisture during heavy rains.
Exterior Indicators
- Damaged Shingles: Shingles that are curling, buckling, lifting, or completely missing.
- Cracked Sealant: Dried, split, or missing caulk and tar around roof penetrations, vents, and chimneys.
- Granule Accumulation: A heavy layer of colored sand-like granules in your gutters, which indicates that your shingles are reaching the end of their functional lifespan.
- Damaged Flashing: Loose, rusted, or bent metal flashing along roof valleys and wall transitions.
Safe Inspection
Never climb onto a wet, slick, or excessively steep roof to inspect it. You can safely identify almost all major exterior warning signs from the safety of the ground by using a pair of binoculars. Walk around the perimeter of your home, paying close attention to the valleys, chimney connections, and vent pipes.
How to Find the Source of a Home Roof Leak Repair
Finding the source of a roof leak is often much harder than actually fixing it. Water rarely travels in a straight line.
Water Travel Dynamics
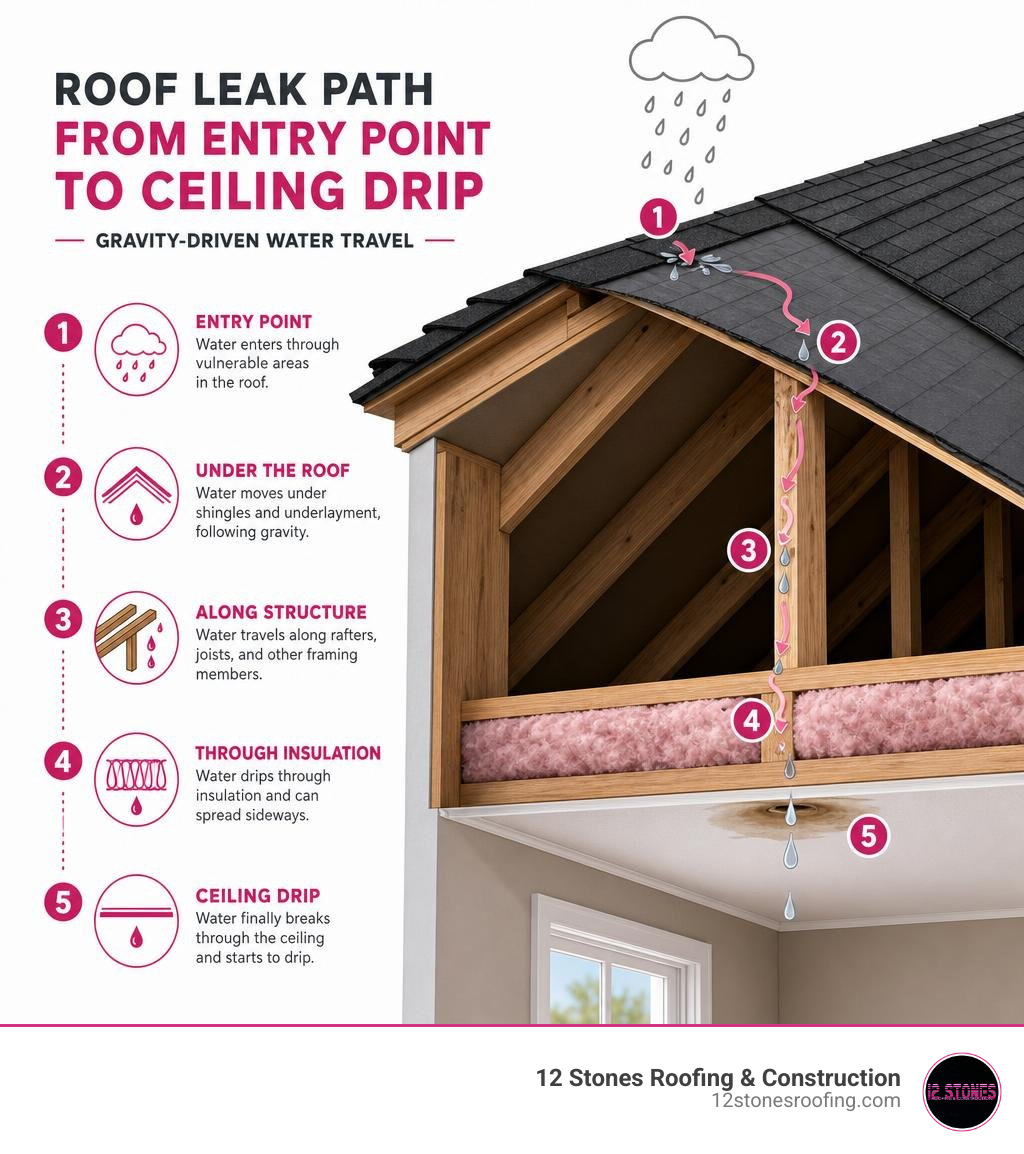
Water enters through a breach in the exterior roofing material, but gravity pulls it downward along the easiest path. Water will run down the slope of the roof deck, travel along a rafter, cling to electrical wiring, or seep through insulation before finally dripping onto your ceiling drywall. This means the water stain on your living room ceiling could easily be 10 to 15 feet away from the actual hole in your roof.

Tracing Water Trails in the Attic
The safest and most accurate way to locate a leak is to conduct an attic inspection during a rainstorm or immediately after one.
- Safety First: Wear a dust mask, safety glasses, and long sleeves to protect yourself from insulation fibers. Only step on solid wooden ceiling joists — never step on the drywall between joists, or you will fall straight through the ceiling.
- Follow the Moisture: Bring a bright flashlight into the dark attic. Look for the wet, reflective trail of water on the rafters or the underside of the roof deck.
- Trace Uphill: Follow the water trail upward. Water always flows downhill, so the highest point of the wet trail is your entry point.
- Mark the Spot: Once you find the source (such as a nail pop or a split in the plywood), drive a nail up through the roof deck from the inside. This will mark the exact location on the outside of the roof so you can easily find it when you go up to perform the repair.
- Use a Moisture Meter: If the wood has dried but you still suspect a leak, use a digital moisture meter to test the relative moisture content of the rafters and sheathing. Wood that registers significantly higher moisture levels than surrounding areas indicates a recurring leak path.
For more technical tips on locating leaks, check out Home Depot’s comprehensive guide on How to Fix a Leaky Roof.
Conducting a Systematic Water Spray Test
If it isn’t raining and your attic inspection didn’t yield clear results, you can simulate a storm using a garden hose. This is a highly effective two-person method.
- Position Your Helper: One person goes inside the attic with a flashlight, a cell phone, and a dry cloth.
- Start Low, Move Slow: The second person takes the garden hose onto a ladder or the roof. Crucial Rule: Always start spraying at the lowest edge of the roof slope first and work your way up. If you start at the top, water will run down the roof and mask the exact location of lower leaks.
- Isolate Sections: Spray a single area at a time — such as a single plumbing vent boot or a chimney corner. Apply low-pressure water to mimic a heavy downpour. Do not use a pressure washer, as high-pressure water can force its way under perfectly healthy shingles.
- Be Patient: Spend at least 5 to 10 minutes soaking each section. It takes time for water to saturate the underlayment, seep through the deck, and travel down to the attic.
- Communicate: When the indoor helper sees the first sign of water dripping through, they should immediately alert the person outside to stop spraying. The area being sprayed at that exact moment is your leak source.
Step-by-Step Guide to DIY Roof Repairs
Once you have identified the exact source of your leak, you can proceed with the repair. If you plan to tackle minor repairs yourself, you must prioritize safety and use professional-grade materials.
Safety First
- Never work on a wet roof: Wet shingles are incredibly slick. Wait for the roof to dry completely before stepping onto it.
- Wear proper footwear: Use rubber-soled, high-traction shoes.
- Use a safety harness: If your roof pitch is steeper than 6:12, always wear a properly anchored roof safety harness.
- Set your ladder correctly: Secure your extension ladder on firm, level ground. The base of the ladder should be placed 1 foot away from the wall for every 4 feet of height.
Essential Materials
For a long-lasting repair, we recommend using high-quality elastomeric sealants. Products like Henry 208R Rubberized Wet Patch are highly effective because they adhere to wet surfaces and can be applied even in damp conditions. Ninety percent of customers recommend this rubberized patch for sealing splits, cracks, and roof penetrations.
For permanent repairs around metal and masonry, always choose a high-grade polyurethane sealant rather than household silicone, as polyurethane provides superior adhesion and UV resistance.
To understand the difference between temporary patches and permanent fixes, refer to Nearby Hunt’s guide on How to Fix a Roof Leak: Temporary & Permanent Repairs 2026.
Replacing a Damaged Vent Pipe Boot
Replacing a split or cracked rubber pipe boot is one of the highest-value, lowest-cost DIY repairs you can perform. A new universal pipe boot costs around $15 to $25 at your local home improvement store, whereas a professional service call can cost several hundred dollars.
- Loosen the Shingles: Carefully slide a flat pry bar beneath the shingles that overlap the sides and top of the pipe boot flange. Gently pry upward to break the sealant bond and expose the roofing nails holding the boot in place.
- Remove the Old Nails: Use the claw of your hammer or pry bar to pull the nails out of the metal or plastic flange.
- Slide off the Old Boot: Lift the old boot up and off the PVC or copper vent pipe. If it is stuck, twist it gently to break the seal.
- Prep the Area: Scrape away old roofing cement and debris from the roof deck and surrounding shingles.
- Apply Sealant: Apply a thick bead of polyurethane sealant around the base of the vent pipe where it meets the roof deck.
- Install the New Boot: Slide the new rubber gasket boot down over the pipe. Press the flange firmly against the roof deck.
- Secure and Seal: Drive corrosion-resistant roofing nails through the pre-drilled holes in the flange. Apply a layer of roofing cement or polyurethane sealant over all exposed nail heads and along the top edge of the flange where the shingles overlap it.
Repairing Step Flashing and Shingles
Step Flashing Repair
If a piece of step flashing along a dormer wall has rusted through or pulled loose, you can slide a new piece of metal flashing directly under the shingle.
- Gently lift the shingle course directly above the damaged flashing using a pry bar.
- Clean out any old, brittle sealant.
- Apply a generous amount of roofing cement to the back of a new piece of pre-bent aluminum step flashing.
- Slide the new flashing piece up under the shingle so it covers the damaged area, pressing it firmly against both the roof deck and the vertical wall.
- Secure the flashing to the wall (never nail through the roof deck side of step flashing, as this creates a leak path).
Shingle Replacement
If a shingle is torn, cracked, or completely missing, you should replace the entire unit.
- Release the Seal: Slide your pry bar under the damaged shingle and the shingle directly above it to break the adhesive seal.
- Remove the Nails: Locate the row of nails securing the damaged shingle (usually located just below the sealant strip of the shingle above). Gently pry up the nails and remove them.
- Slide Out the Shingle: Pull the damaged shingle downward to remove it.
- Insert the New Shingle: Slide a matching replacement shingle into the empty space.
- Nail It Down: Drive four new roofing nails into the designated nail line of the new shingle.
- Seal: Apply a dime-sized dab of roofing cement under the tabs of the new shingle and the shingle above it to seal them down.
Emergency Mitigation and Temporary Fixes
When a severe storm hits La Porte or Pasadena, you cannot safely make permanent repairs in the middle of a torrential downpour. Your immediate priority is to stop water from entering your living space and limit secondary structural damage.
Emergency Tarping
If safe to do so once the rain stops or slows down, you can install a heavy-duty polyethylene tarp over the damaged section of your roof.
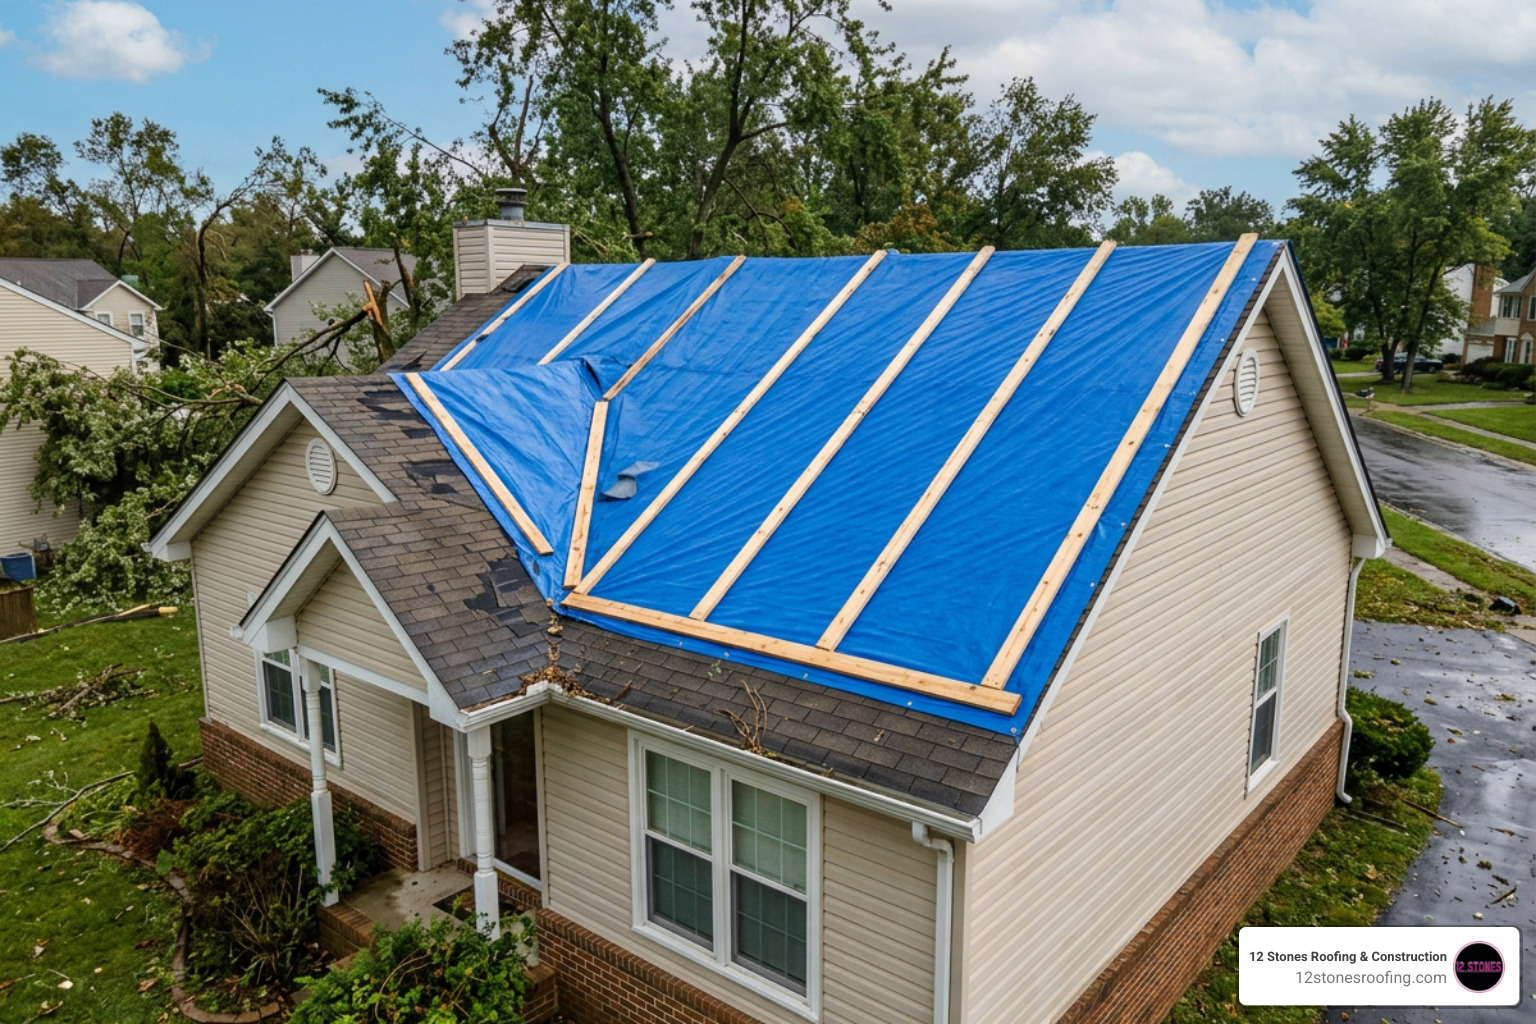
- Choose the Right Size: Use a tarp that extends at least 4 feet beyond the damaged area on all sides and wraps completely over the peak of the roof. Wrapping the tarp over the ridge prevents water from running under the top edge of the tarp.
- Secure with Wood Batten Boards: Never nail a tarp directly to your shingles, as this creates dozens of new holes that will leak later. Instead, roll the edges of the tarp around 2×4 wooden boards (batten boards).
- Screw Down the Boards: Drive exterior wood screws through the wooden batten boards and into the roof deck. This sandwiches the tarp tightly against the roof, preventing high winds from ripping it away.
Ceiling Drainage
If water is actively pooling above your ceiling drywall, you will notice a sagging, water-filled bubble forming in your paint. If left alone, the weight of the water will eventually cause a massive section of drywall to collapse, ruining your furniture and flooring.
- Place a Bucket: Position a large bucket directly beneath the center of the ceiling bubble.
- Poke a Drain Hole: Take a long screwdriver or a drywall saw and carefully poke a small hole directly in the center of the sag.
- Control the Flow: This will release the trapped water, allowing it to drain safely into your bucket in a controlled stream rather than causing a sudden ceiling collapse.
To learn more about short-term fixes, read our articles on Temporary Roof Leak Fix and Stop the Drip: Short-Term Solutions for a Leaky Roof.
When to Call a Professional for Home Roof Leak Repair
While minor repairs like replacing a single shingle or sealing a pipe boot are highly manageable DIY projects, you must recognize when a leak is beyond your skill level.
You should always contact a professional roofing contractor if:
- The Pitch is Too Steep: Any roof with a slope greater than 6:12 (a 6-inch rise for every 12 inches of run) requires specialized safety gear and experience.
- You See Structural Rot: If your attic inspection reveals sagging rafters, crumbling plywood decking, or widespread black mold, the structural integrity of your home is compromised.
- There Are Multiple Active Leaks: Multiple leaks across different areas of the roof indicate systemic failure of the underlayment or shingles, which usually means it is time for a full roof replacement.
- The Roof is Nearing Its End of Life: If your asphalt shingle roof is over 20 years old, patching individual spots is a temporary band-aid on a system that needs complete replacement.
If you find yourself facing an active roofing emergency, please refer to our guide on Got a Gushing Roof? Navigating Emergency Leak Services.
Budgeting and Insurance for Roof Repairs
Understanding the financial aspects of roof repairs can help you make informed decisions and avoid unexpected out-of-pocket expenses.
For a comprehensive guide on budgeting for these services, check out our resource on Budgeting for Professional Roof Leak Repairs.
Understanding Professional Home Roof Leak Repair Costs
The cost of hiring a professional roofer to fix a leak depends heavily on the severity of the damage, the roofing material, and the ease of access.
In the Twin Cities area, data from Kuhl’s Contracting shows that 90% of small roof leak repairs fall within the $275 to $400 range. However, for more complex or structural repairs, costs can rise significantly.
The table below outlines typical professional cost ranges:
| Repair Type | Average Cost Range (Asphalt Shingle) | Average Cost Range (Metal/Tile) |
|---|---|---|
| Minor Repair (e.g., single pipe boot, minor flashing) | $150 – $400 | $300 – $600 |
| Moderate Repair (e.g., valley repair, small shingle section) | $400 – $1,000 | $600 – $1,500 |
| Major Repair (e.g., structural decking replacement, large area) | $1,000 – $3,000+ | $1,500 – $4,500+ |
Insurance Coverage and Storm Damage
A common question homeowners ask is whether their insurance policy will cover the cost of home roof leak repair.
- Sudden and Accidental Damage: If your roof leak was caused by a sudden, covered peril — such as high winds blowing off shingles, hail fracturing the underlayment, or a tree branch falling onto your roof — your homeowners insurance policy will typically cover the cost of repairs. On average, insurance policies cover about $1,000 of a standard $1,500 roof leak repair, leaving the homeowner with a $500 out-of-pocket expense.
- Wear and Tear/Neglect: If your roof leaks because it is 25 years old and the shingles have naturally reached the end of their lifespan, or because you failed to clean your gutters and water backed up, your insurance claim will likely be denied. Insurance companies view routine maintenance as the homeowner’s responsibility.
- Documentation is Critical: If your roof is damaged during a storm, take clear, dated photographs of the damage immediately. Keep all receipts for temporary emergency repairs (like tarps or plywood), as insurance companies will often reimburse you for the costs incurred to prevent further interior damage.
Frequently Asked Questions about Roof Leaks
Can I fix a roof leak from the inside?
No, you cannot permanently fix a roof leak from the inside. While you can apply a temporary patch or diversion system in the attic to direct water away from your ceiling, the water will continue to rot the roof deck and rafters until the exterior source is sealed. Any interior sealant will simply trap moisture inside your roof structure, accelerating wood rot and mold growth.
Does homeowners insurance cover roof leak repairs?
Yes, homeowners insurance covers roof leak repairs if the leak was caused by a sudden, covered peril like a windstorm, hail, or a fallen tree limb. It does not cover leaks resulting from age, lack of maintenance, or general wear and tear. Always document storm damage with photos immediately to support your insurance claim.
How long does a temporary roof patch last?
A temporary roof patch or emergency tarp typically lasts between 30 to 90 days. While high-quality roofing cement can sometimes hold for 1 to 3 years, these methods are temporary measures meant to protect the home until a permanent, professional repair is completed. Prolonged exposure to sun and wind will degrade temporary patches quickly.
Conclusion
When it comes to home roof leak repair, prompt action is the single most important factor. A minor drip that costs $250 to fix today can easily balloon into a $5,000 mold remediation and structural repair project if left unaddressed for a single season. By learning how to spot the early warning signs, trace water trails systematically, and apply temporary emergency fixes, you can protect your home and your family from serious water damage.
For more information on local roofing solutions, read our guide on Protecting Your Home: Roof Leak Repair Services in Pasadena, Texas.
If you are dealing with a stubborn leak, a steep roof, or storm damage, do not risk your safety. Contact us at 12 Stones Roofing & Construction today or visit our website to schedule a professional, transparent roof inspection. We serve Pasadena, La Porte, and the surrounding communities with reliable, veteran-owned roofing expertise.